

Note: This article may contain affiliate links. If you click through and make a purchase, we earn a small commission at no extra cost to you.
After more than 5 years of sterling service, we rewarded our Wedgetail Camper battery with a couple of presents.
It was time to retire our 100Ah lithium battery, then replace it with a 200Ah lithium camper battery. And after a few years of thinking about it, we finally took the opportunity to install a 350W inverter.
Our Wedgie has been all over Australia, along some of the roughest roads and tracks in this country. It has performed faultlessly, as you’ll see in this long-term review. For those of you not familiar with Wedgetail Campers, they’re a premium quality, Australian-made slide on camper.
If you look through our Wedgetail Camper review, you’ll notice we mentioned a few things we’d like to add or change. Among them were:
- Upgrade the 100Ah lithium battery with a 200Ah lithium battery, and
- Add an inverter so we can more easily charge devices.
Well, they’re finally done!
We’ll go through them in detail, in case you’re thinking of doing something similar.
1. Wedgetail Camper Battery Upgrade
Let’s look at what was originally installed and why we want to change it.
Original Dual Battery System
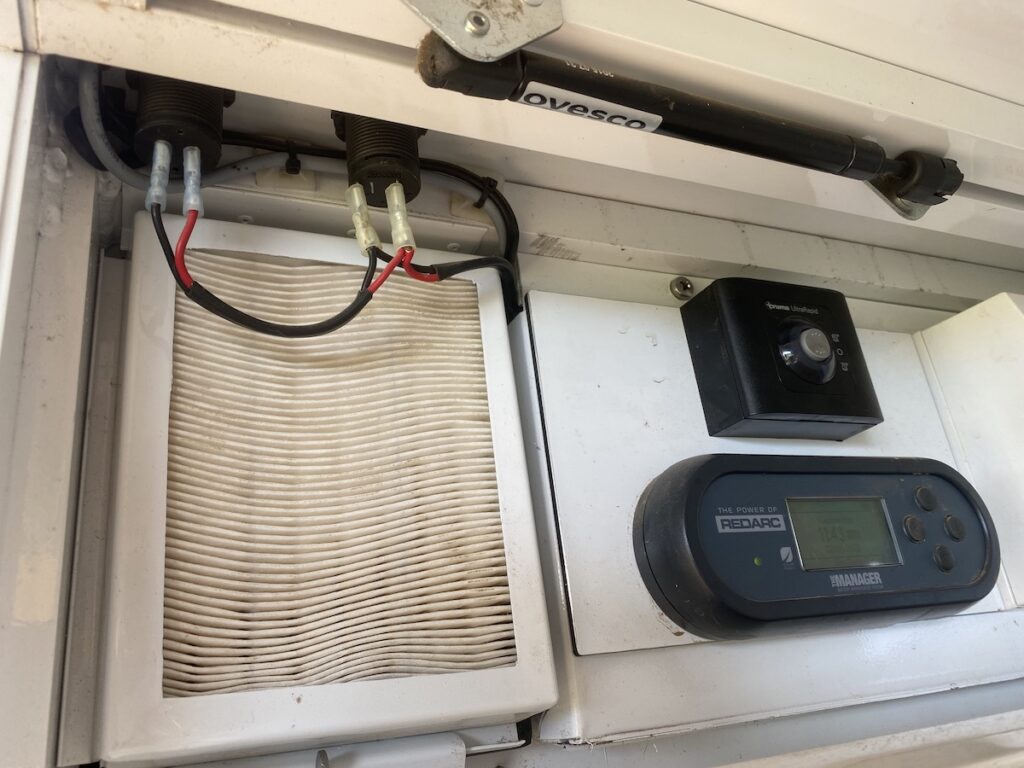
The Wedgetail Camper has its own self-contained dual battery system. At the heart of our system was a REDARC Manager30 battery management system (BMS) and a 100Ah Revolution Power lithium (LiFePo4) battery.
The REDARC Manager30 has a 240VAC mains power input, a solar input, and a 9-32V input from the vehicle’s start battery. It has a maximum output of 30 amps @ 12 volts nominal charge.
Importantly, it also has a lithium charging profile. If your existing BMS doesn’t have a lithium charging profile, you’ll need to replace it.
Note: The latest BMS from REDARC Electronics is the Manager Alpha50 with RedVision display. It includes features like back-charging of the start battery, and recovery of a flat start battery.
The Revolution Power battery has performed faultlessly. It has the following specs:
- Usable capacity of 100Ah
- Maximum continuous discharge (for 60 mins) of 100A
- Recommended charge current of ≤50A
- Maximum charge current of 50A
All these numbers are well and good. But what does this mean in practical terms?
Quite simply, it can be recharged quickly and can handle high discharge currents. And the entire 100Ah is available… unlike many cheap batteries where their capacity is often grossly overstated. The total capacity of this battery is around 125Ah.

So why change it?
Well, if we’re parked up off-grid for a few days and the weather’s lousy, by the third day we’re struggling for power.
Also, an inverter in the Wedgie would be very handy. We already have a 350W inverter hooked up to the dual battery system in our truck. It lives in the cab and we use it to charge all manner of things… phones, iPads, laptops, drone and so on.
However, we decided an inverter in the Wedgie itself would be really handy. On rainy days we can use our laptops inside the camper, without trying to run power cords from the inverter in the cab. Plus there’s always the ever-growing collection of devices which need charging.
But an inverter can be a significant drain on the battery. We needed a bigger battery.
When REDARC released their range of lithium batteries, we saw an opportunity to do a long-term test and upgrade our system at the same time.
We have a long relationship with REDARC Electronics, having tested and reviewed their equipment for several years now. So when we approached them, they were only too happy to provide a battery.
Before we look at the new battery’s specs, let’s talk about battery loads for a minute.
Sizing Your Battery
Before you do a camper battery upgrade, consider what your loads will be, and your needs.
For example, we know a 100Ah lithium battery gives us about 2½ days of capacity when off-grid in cloudy weather. We’d like at least another 2 days up our sleeves.
And after living in our camper full-time for nearly 4 years, we know an inverter would make a big difference. It’s a convenience thing.
We don’t need a large inverter… 350W is more than enough for our needs. The largest draw will be a laptop, which will draw about 10A from the battery and be fully charged in less than an hour.
I had originally settled on a 1,000W inverter. But then we took another look at what we use. 1,000W was overkill. Plus they’re large and our space is limited.
In the end, we decided a 350W inverter would easily do the job and a 200Ah lithium battery would be more than enough.
What battery and inverter size you choose depends entirely on what electrical gimzos you want to take with you. Once you know this, you’ll be able to figure out the loads you expect the battery will need to cope with.
We won’t go into how to calculate loads (Ah, Wh and so) here. That’s a whole other topic for another time.
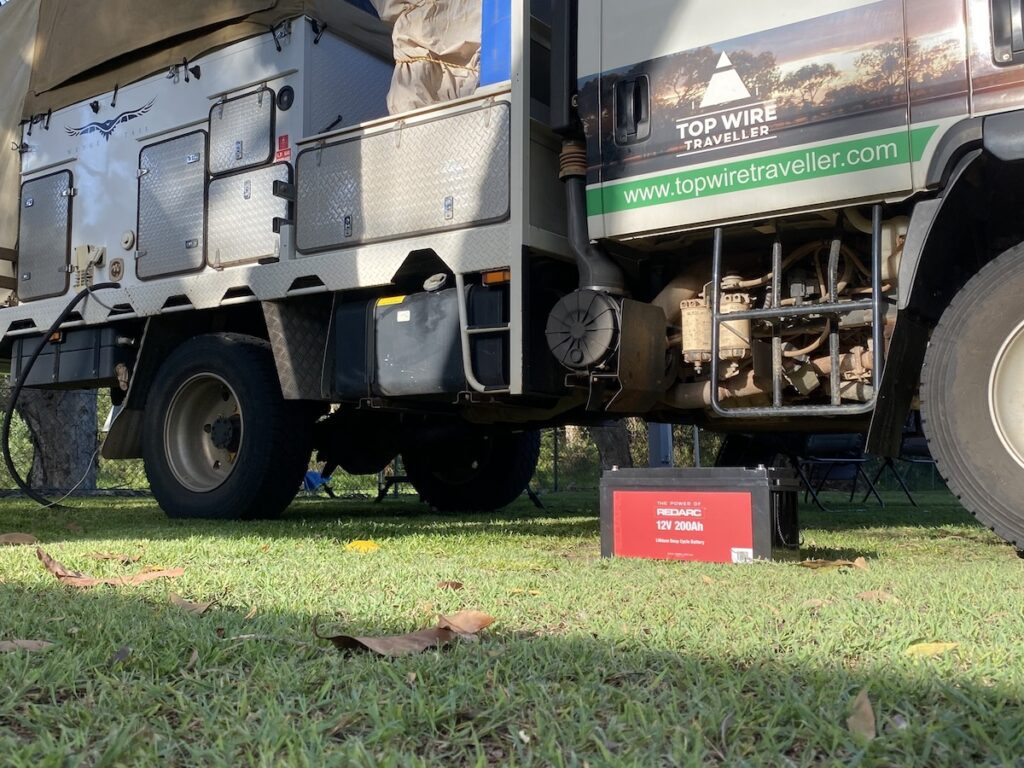
Okay, so we settled on a 200Ah lithium battery and a 350W inverter. Let’s have a look at the specs of REDARC’s 200Ah battery in more detail.
Stepping Up To a Larger Battery
REDARC Electronics supplied us with a 200Ah lithium (LiFePo4) battery (model LBAT 12200) for a long term test. It has the following specs:
- Usable capacity of 200Ah
- Maximum discharge (for 60 mins) of 170A
- Recommended continuous discharge (for 120 mins) of 100A
- Recommended charge current of ≤50A
- Maximum charge current of 100A
Just like the original Revolution Power battery, the Ah rating is usable capacity. Be careful when you’re buying cheaper lithium batteries. They normally quote total capacity, not usable capacity. Are you comparing apples with apples?
The next step was to install it into our Wedgetail Camper.
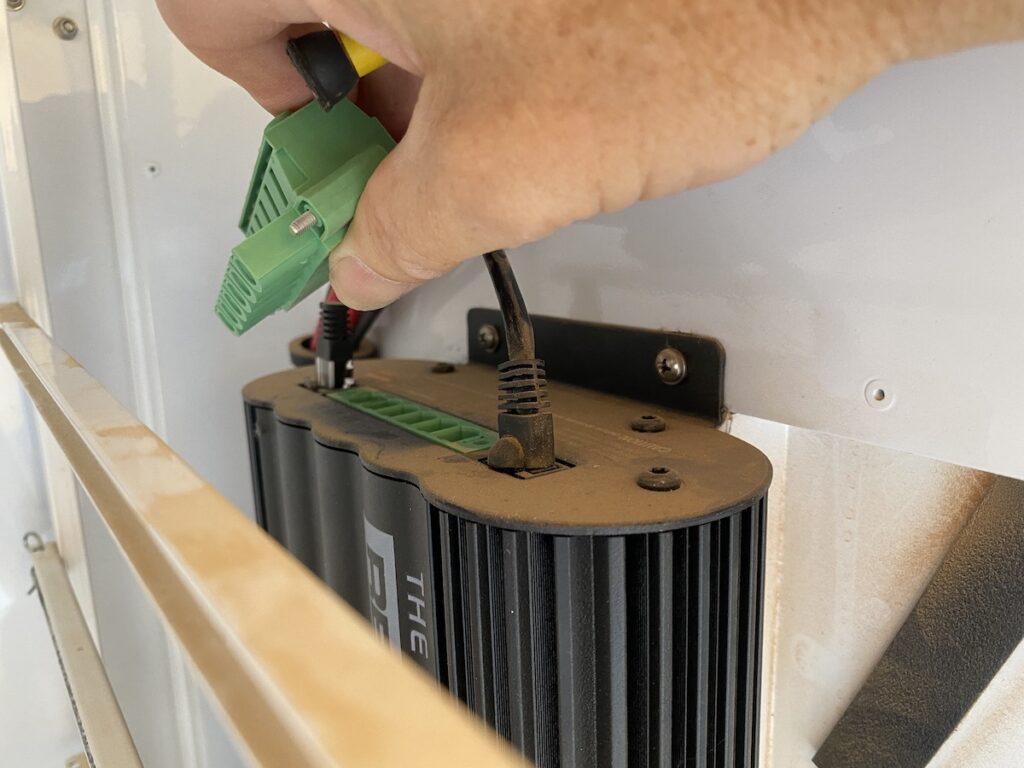
Disconnecting Power
First things first. Before you even touch the old battery, be sure to disconnect the battery management system. Some Wedgetail Campers run an Enerdrive BMS, while ours has a REDARC BMS.
And if your BMS has a 240 volt mains power supply, check then double check it’s not connected to mains power.
Remove the green terminal block from the end/top of the REDARC BMS. For the Enerdrive BMS, disconnect all cables on the terminal block. This protects the BMS from internal damage.
Then, make sure you disconnect any solar panels. This means unplugging the portable solar panel at the Anderson plug on the roof.
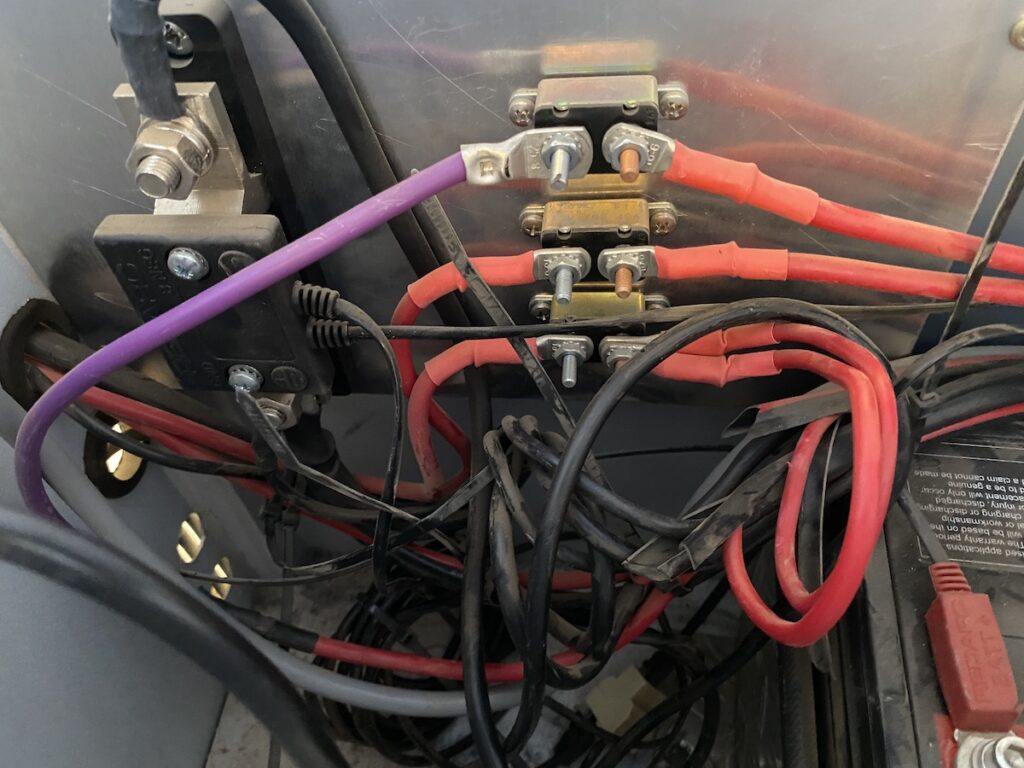
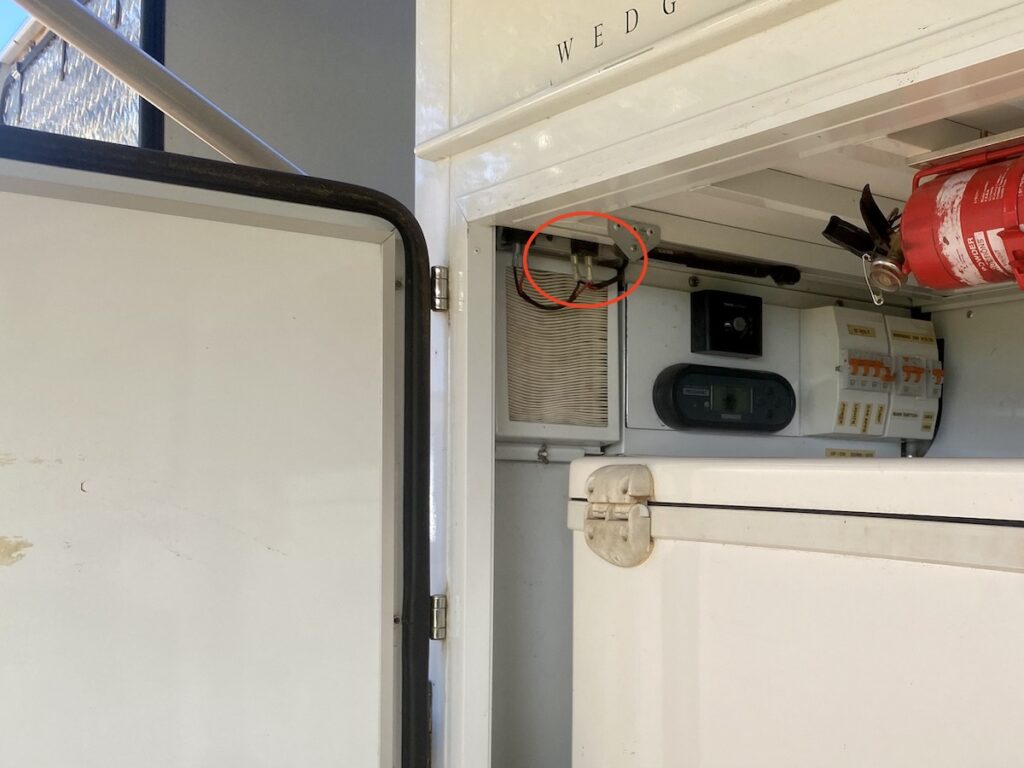
If you don’t, one of the auto reset circuit breakers shown below will still be live. On ours, it’s the bottom one where you see the two cables come in (the two solar inputs).
Note: Our Wedgetail Camper is over 5 years old and was wired by the previous owner of the business. I believe the circuitry and wiring in general has been vastly improved since then.
I replaced the 40A auto circuit breaker for the solar inputs with a 40A fuse. Why? Two reasons:
- In the confined spaces, I broke its foot mount off, and
- Because I don’t think auto circuit breakers are a good idea.
To my way of thinking, if a circuit has tripped then it should not be reset until the short has been detected. However, these auto circuit breakers will happily reset and trip indefinitely.
The other reason I don’t like them is, the terminals are exposed. Be careful if you’re waving a spanner or screwdriver down in there!
Down the track, I’m going to replace the other two with fuses and tidy up that mounting panel. That’s a job for another day…
Battery Installation
The most difficult part about a Wedgetail Camper battery upgrade is squeezing the 200Ah battery into the incredibly tight space. And the battery compartment can only be accessed through the floor of another compartment.
So it’s a job for people with extra-long arms… and that’s definitely not me!
Getting the old 100Ah Revolution Power battery out was easy. Although I’m glad it was a light (12.5kg) lithium battery and not one of those chunky AGM batteries, which can weigh 3 times as much.
With the old battery out, I re-aligned the battery clamp mounts and removed an end plate that had been installed to stop the battery moving about. I used this end plate to mount our relocated water pump on. But that’s a story for another time!
Then I cut and fitted 10mm thick closed cell neoprene to the floor. This acts as a cushion for the battery.
I also took the opportunity to clean up the existing wiring as much as I could in the confined conditions.
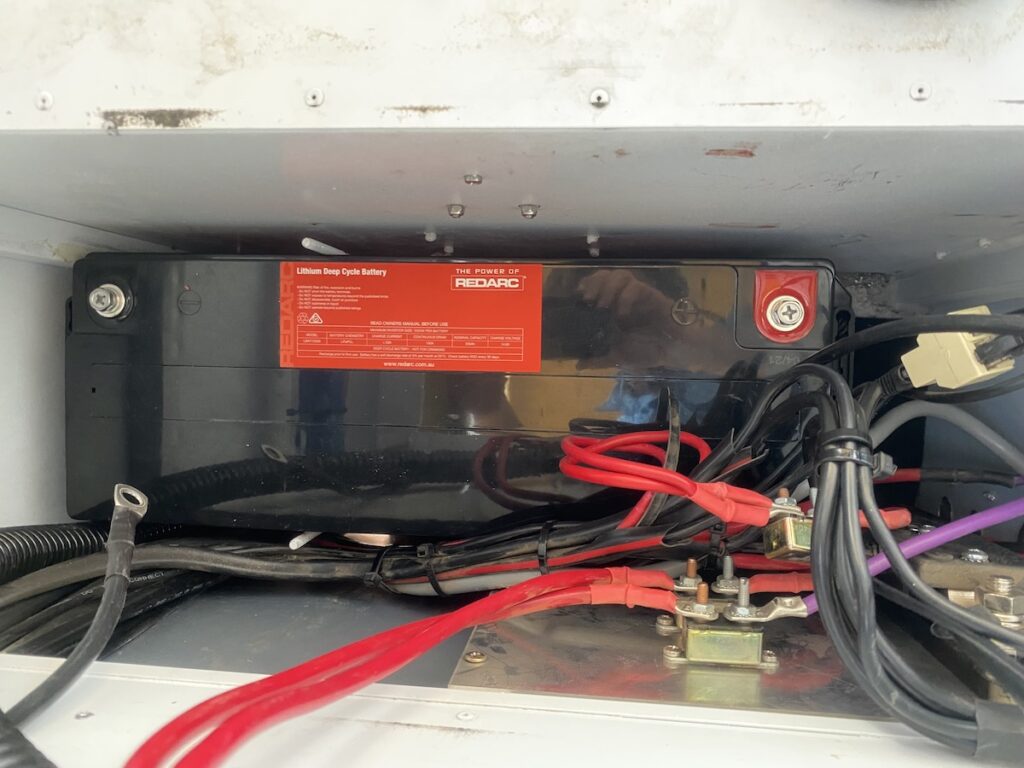
Getting the new 200Ah battery in was a challenge. Thankfully, lithium batteries have no liquid in them. So I was able to lower it in on its end, then rotate the battery around until it sat flat on the floor of the compartment.
One watch-out. The Revolution Power battery is 27mm lower than the REDARC battery (215mm vs 242mm). So the threaded rods for the battery clamp were too short.
Strangely, they are ¼”-UNC threads while the rest of the Wedgetail Camper is metric. At least, they are on ours…
Given the nearest fastener shop was over 430km away when I installed the battery, it was time for some improvisation. I used two long nuts (or coupler nuts) then ¼”-UNC bolts and nuts.

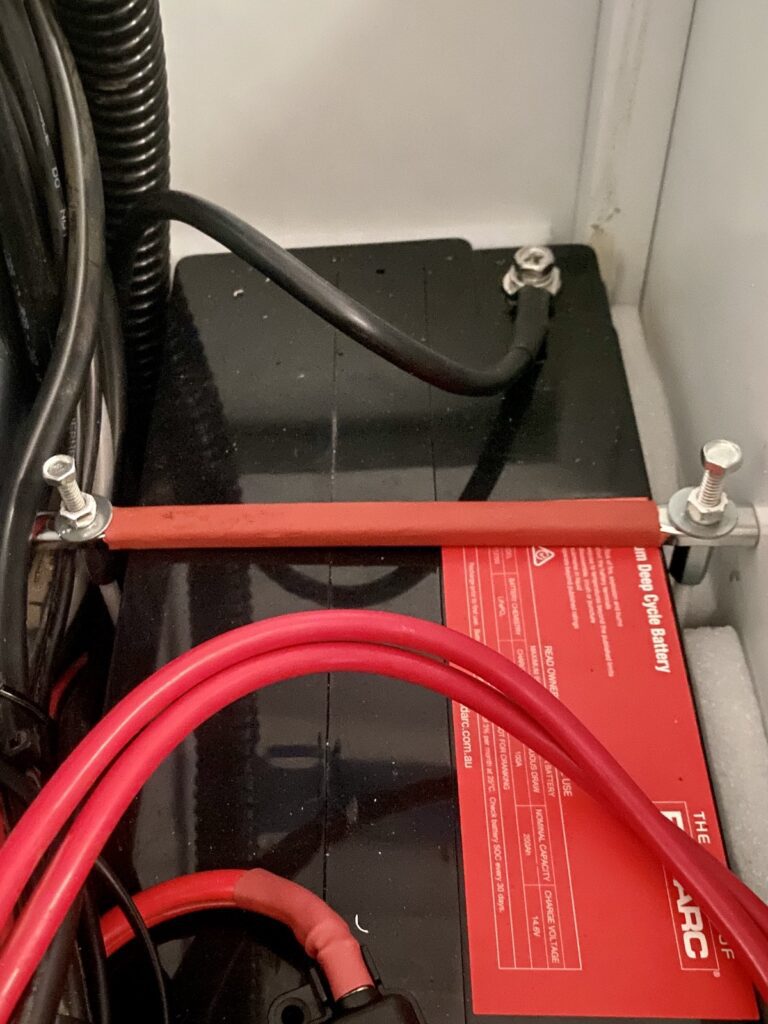
It’s ugly, but it solves the problem.
I should have mentioned… before tightening the battery clamp, I inserted styrofoam packing down the sides and ends of the battery. This prevents the battery from rubbing on the compartment walls.
With the battery installed, the next job was to fit the 350W inverter.
2. Wedgetail Camper Inverter Installation
Those of you with a Wedgetail Camper will know one of its best features is the ability to access most things from both inside and outside.
We decided to continue this theme with the inverter.
By mounting the inverter in the clothes cupboard, we can plug into the inverter from both inside and outside. The other benefits are:
- It’s out of the way, not taking up any usable space,
- It’s in a clean and dry environment,
- It has plenty of air space around it for cooling, and
- It’s close to the battery, so the cabling is short.
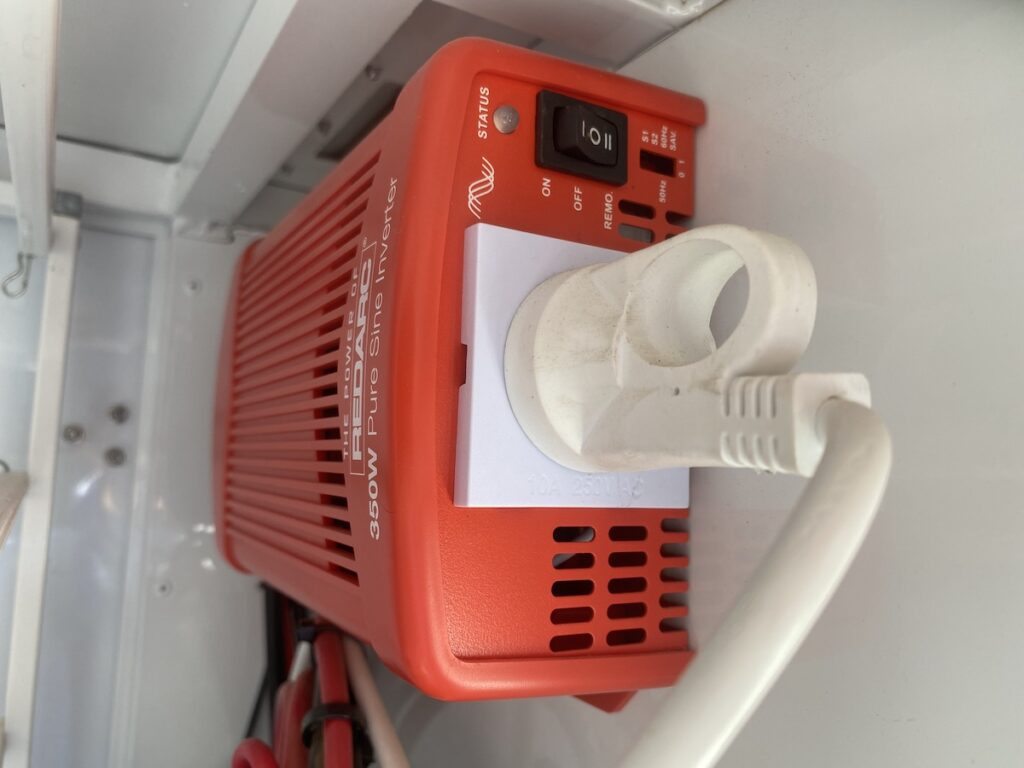
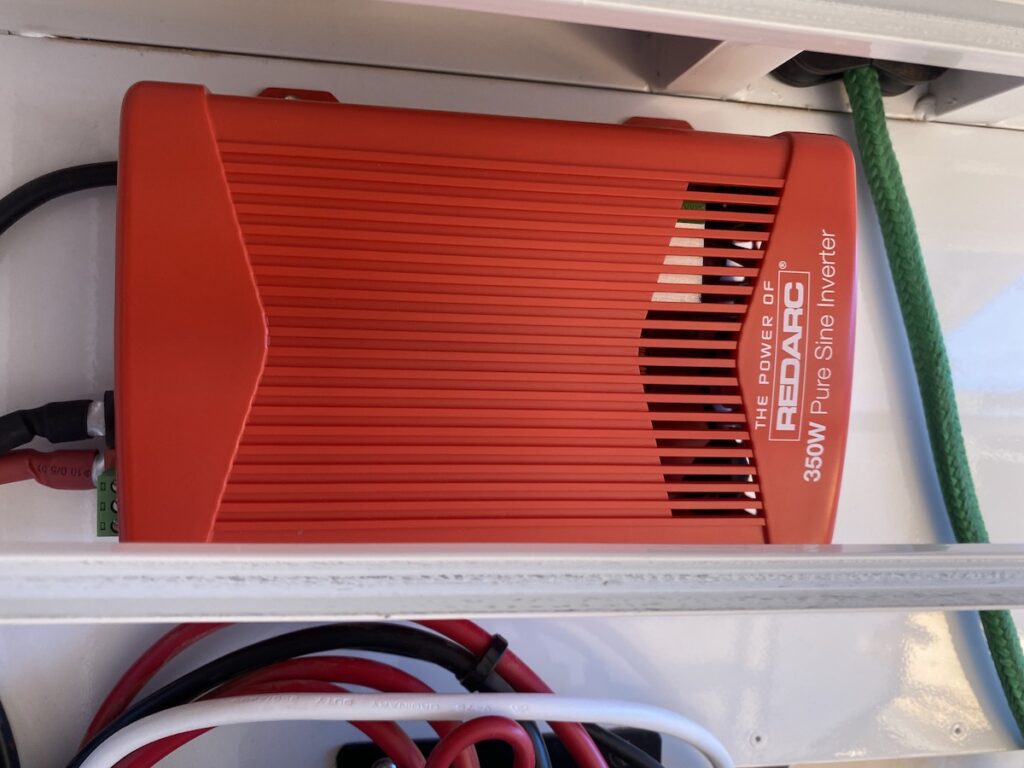
It’s a REDARC 350W pure sine wave inverter.
Mounting The Remote Outlet and Switch
It’s all well and good to mount the inverter in the clothes storage cupboard. But we want easy access from the inside of the Wedgie as well.
Conveniently, the REDARC inverter has a “remote” function. You can install a remote switch and operate the inverter from there. The remote also has fault indicator lights, which is useful when the inverter’s tucked away in a cupboard.

I decided to fit a simple power plug with the remote switch flush-mounted beside it. Then I ran a modified extension cord from the inverter to the power plug. This way, we could easily unplug the cord and use the inverter from the outside.
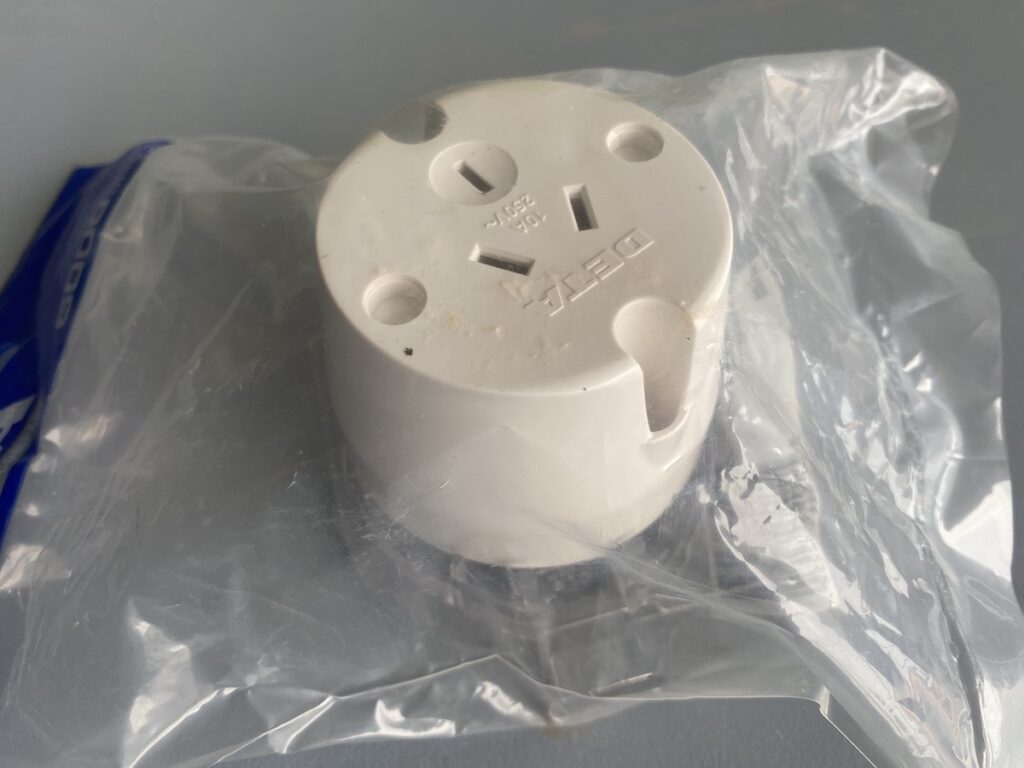
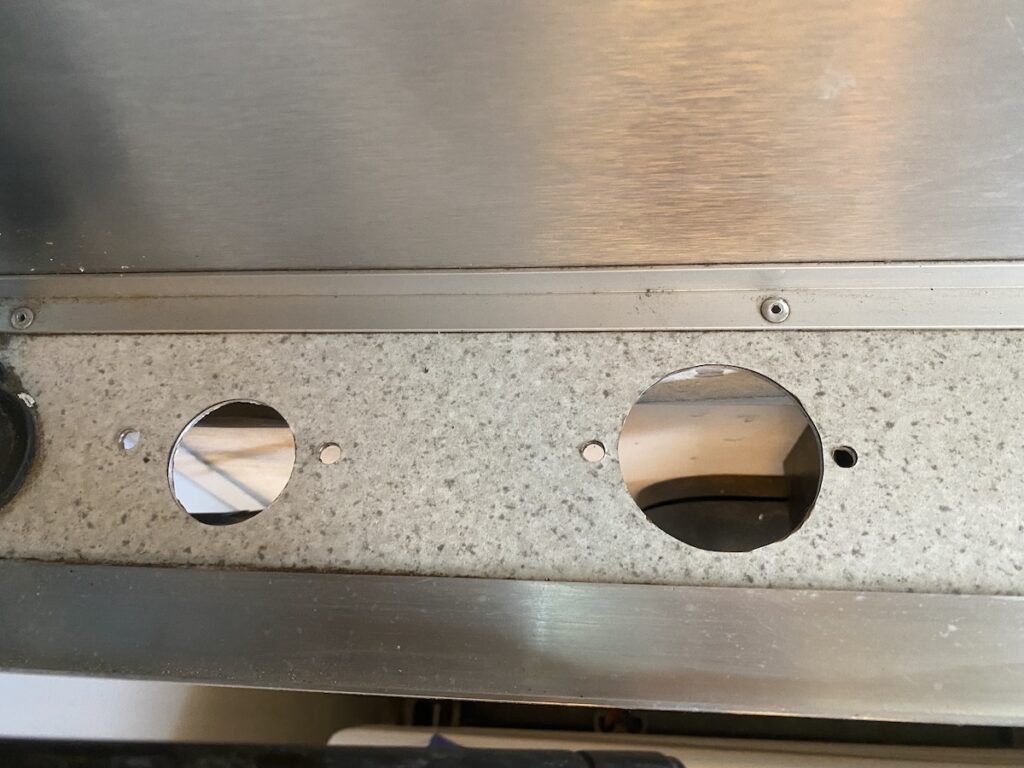
The most convenient spot for us is at the front left corner of the inside bench. There are already USB and cigarette lighter 12V sockets in this location. However, we never used the cigarette lighter socket, so I took it out and fitted the 3 pin plug in its place.
Note: Always keep in mind, the inverter output is 240VAC. It can easily kill you. Always use a licensed electrician for wiring and installation of power points.
With the cigarette lighter sockets removed, I hole-sawed two holes and drilled holes for the mounting screws. It’s a tight fit and you have to be careful installing the remote. After measuring and re-measuring multiple times, I was confident of the hole position.
Check the position carefully, as the remote only just fits.
The final result is a neat installation, with the new 240VAC outlet and its on/off switch (the inverter remote) sitting side-by-side.
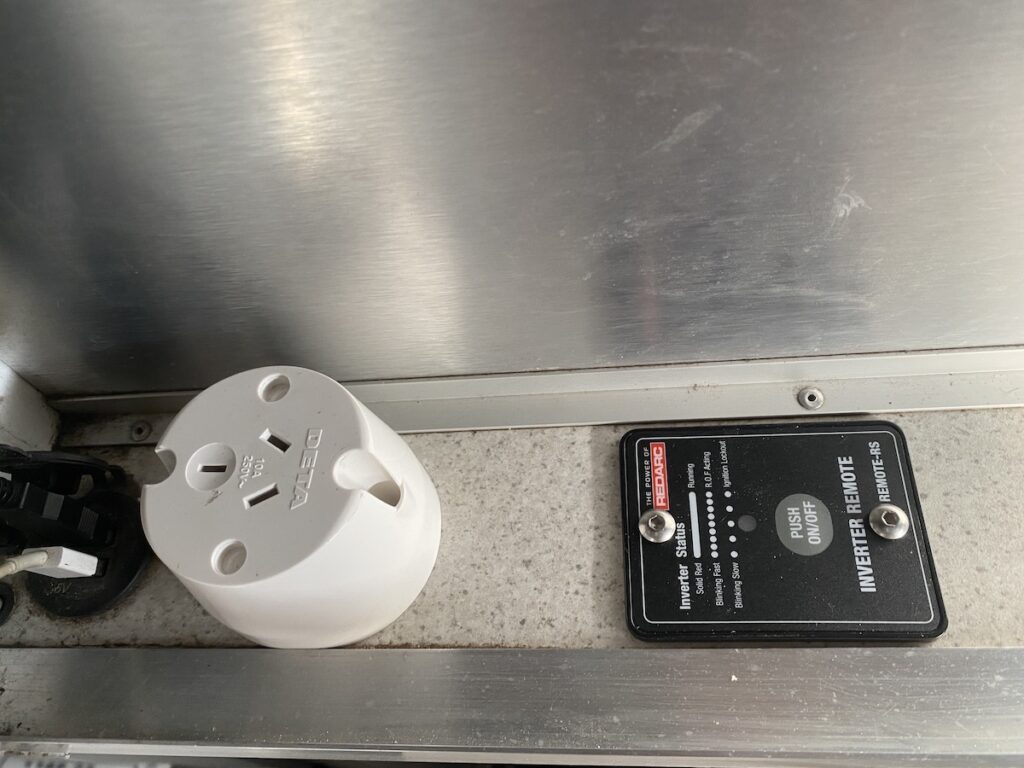
I used a modified extension cord to run power from the inverter to the 240VAC plug. This way, we can unplug the cord from the inverter and use it from outside if needed.
Running the power cord and inverter remote cable is a bit of a mission. It’s a matter of following existing cables and cable tying them together.
Wiring The Inverter – A Watch-Out With The Terminals
Correct cable sizing is absolutely critical in 12 volt circuits. Every REDARC inverter comes with a user/installation manual – remember those? They clearly specify the correct cable size for your inverter, based on cable length.
Whatever you do, don’t scrimp on cable size. If you do, you’ll have large voltage drops, hot cables and potentially, all sorts of other nasty issues. Go here to understand more about why correct-sized cabling is critical to your installation, plus how to calculate the correct-sized cables.
Related Resources: Download Excel versions of our Cable Calculators from our Free Resources page
+
a bonus Voltage Drop Calculator.
That’s another benefit of keeping the inverter close to the camper battery – I can keep cable sizing to a minimum. For this installation, I used 6AWG cable and a 40A fuse.
There is one slightly annoying watch-out when installing this inverter. The terminals each have a screw which goes through each ring terminal crimp lug. This ensures a good connection between the terminal face and the lug.
But they also have a narrow, moulded plastic shroud. This means you must use ring terminal crimp lugs narrow enough to fit inside the shroud. The correct crimp lugs are 10mm2/6mm (10mm2 cable with a 6mm diameter hole). They are the same ones which come with the REDARC 40A fuse kit.
We were over 430km from the nearest electrical supplies shop and didn’t have these. So I had to cut the terminal shrouds back and file down the sides of slightly bigger ring terminal crimp lugs to make them fit.
It’s a slightly annoying design and could easily be changed with a simple re-design.
Wiring The Inverter – Connecting The Cables
As with all installations, keep your cables as short as possible. This reduces voltage drop, a critical factor in all 12 volt installations.
Our cable run is just on 1 metre (that’s total cable length – both positive and negative cables). According to REDARC’s instructions, 6AWG is okay for up to 2 metres.
I ran the inverter’s positive supply directly from the new 200Ah battery, with a 40A fuse right at the battery terminal. Remember, fuses are there to protect the cable in case of a short. Fuses should always be located as close to the supply end as possible.
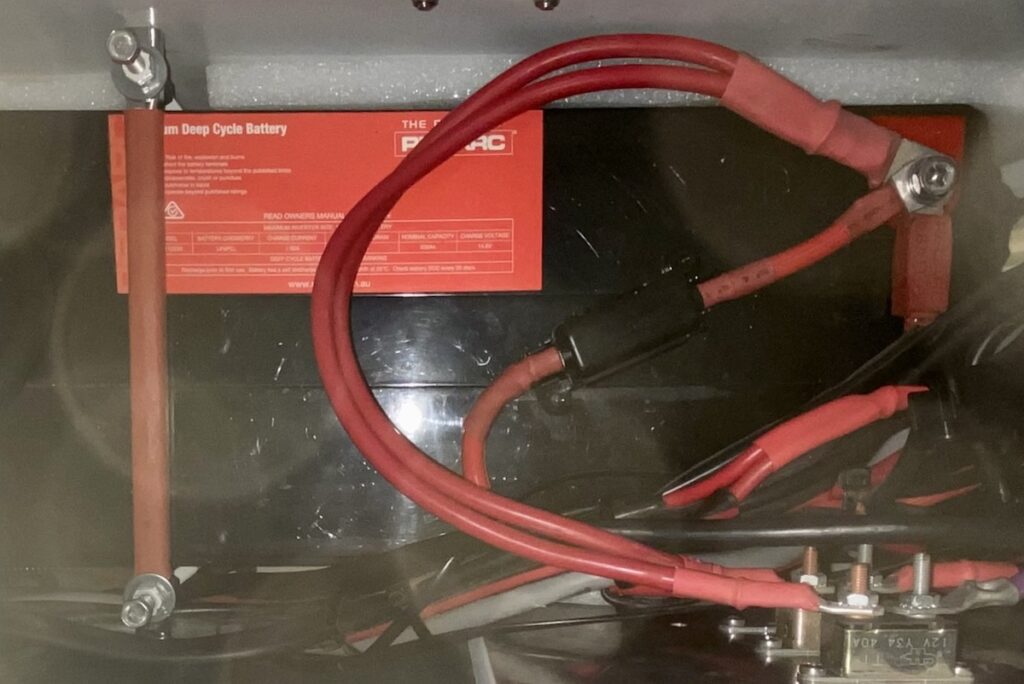
The REDARC BMS has a battery sensor. It measures current flow, voltage and temperature. One end connects to the negative terminal of the battery, while the other end connects to a common ground point.
You need to make sure the negative cable from the battery is large enough to handle the maximum current of the system.
In our Wedgetail electrical system, all negative terminals are connected to the common ground terminal of the battery sensor. This becomes messy when there are multiple cables. The terminal looks like a Christmas tree!
Ideally, I would have added a remote negative terminal block, connected all negative cables to the terminal block, then had one large negative cable running back to the common ground terminal of the battery sensor.
As it was though, I connected both the inverter’s negative cable and its chassis earth cable to the common ground terminal… no mean feat in such a confined space.
The Outcome
We are noticing a big difference with the new REDARC 200Ah Lithium battery compared to the original 100Ah battery.
A typical stop for us might be pulling up mid-afternoon, then camping overnight. The fridge, some lighting, and the usual array of devices being charged from USB outlets… that’s normally what we’d use overnight.
With the 100Ah battery, next morning the charge would be around 80%. Now, it’s between 90 and 95%. Not surprising, since the new battery’s double the capacity of the old one.
However, it’s more about peace of mind. We know we have stacks of battery capacity now.
And having the convenience of a 240VAC outlet inside the camper is brilliant. We use it every day. When it’s not charging a laptop, it’s busy charging an electric toothbrush. That’s what I call camping in comfort!
Go here for more How-To Guides and tips.

Get your Traveller’s Guides
… and a whole lot more at our FREE RESOURCES Page!
Any questions or comments? Go to the Comments below or join us on Pinterest, Facebook or YouTube.
Any errors or omissions are mine alone.