

If you have a portable ARB air compressor and want to install it permanently in your vehicle, it’s a straightforward job.
We bought our ARB 12V Twin Compressor over six years ago now. It very nearly ended up in the bin more than once. Go here for the details on why we were less than satisfied with our ARB Twin… to say the least!
Thankfully, two replacement motor assemblies solved the problem. It’s been working reliably ever since. Go here for a 6-year review on our ARB Twin Compressor.
After six long years, I finally trust the compressor enough to mount it permanently into our Isuzu NPS truck. It’s been a long wait!
During the install, I took the opportunity to finally do something about the woefully undersized wiring that ARB somehow think is good enough.
What’s The Issue With The Cabling?
Short answer, the cables are undersized and the connectors are way undersized. Here’s what I mean…
- ARB supply the portable air compressor with a 2 metre supply cable (give or take a bit) and alligator clamps to connect directly to the battery terminals.
- Each compressor motor draws 28 Amps.
- Each motor has a dedicated positive supply cable, 12AWG (equivalent).
- The negative cables from the motors connect into one 8AWG (equivalent) cable near the motors.
Total cable run is 4 metres (2m + 2m).
Using our Cable Size Calculator, it’s obvious the cables are all undersized for a 4 metre run at the specified currents. And that’s exactly what we were seeing when the compressor was running.
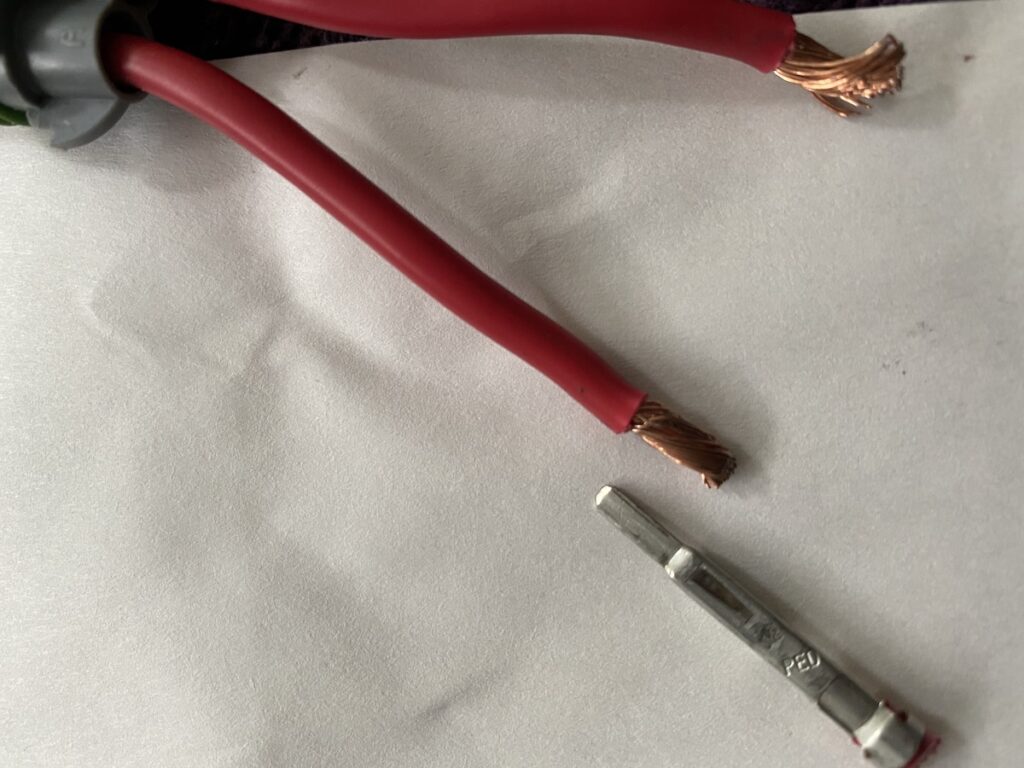
- The positive cables should be 8AWG, not 12AWG. They’re about one third the size they should be.
- The negative cable should be 6AWG, not 8AWG. It’s about half the size it should be.
Related Resources: Download Excel versions of our Cable Calculators from our Free Resources page
+
a bonus Voltage Drop Calculator.
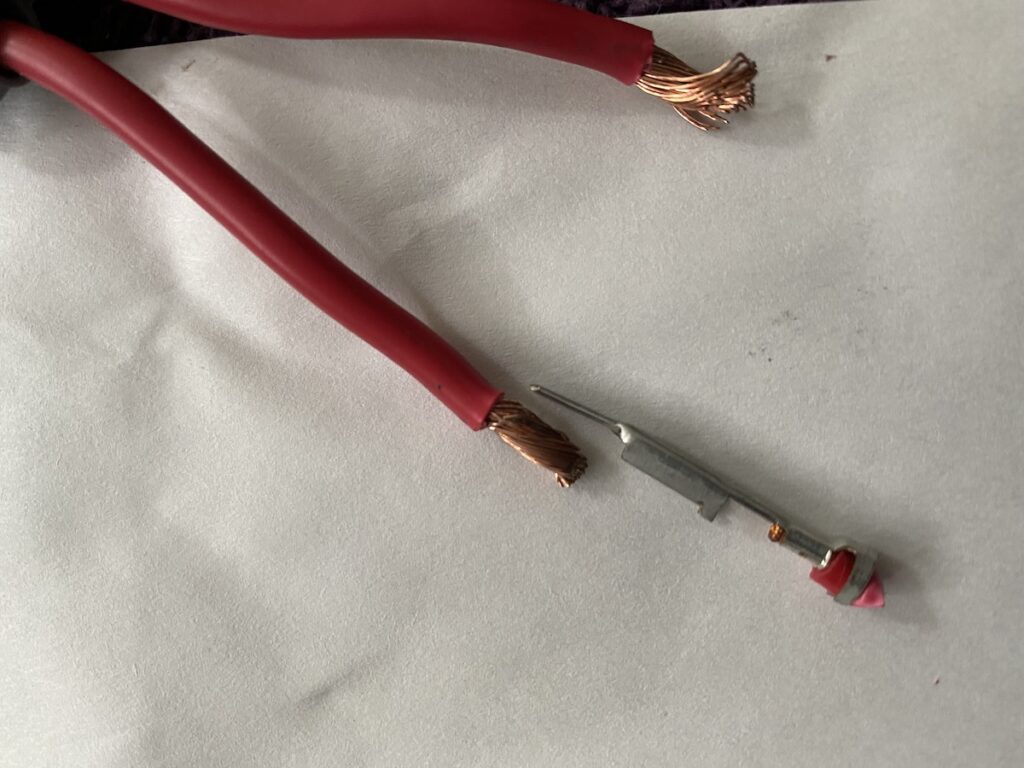
No wonder the cables were too hot to touch when the compressor was running! And no wonder the cable insulation has melted in several places.
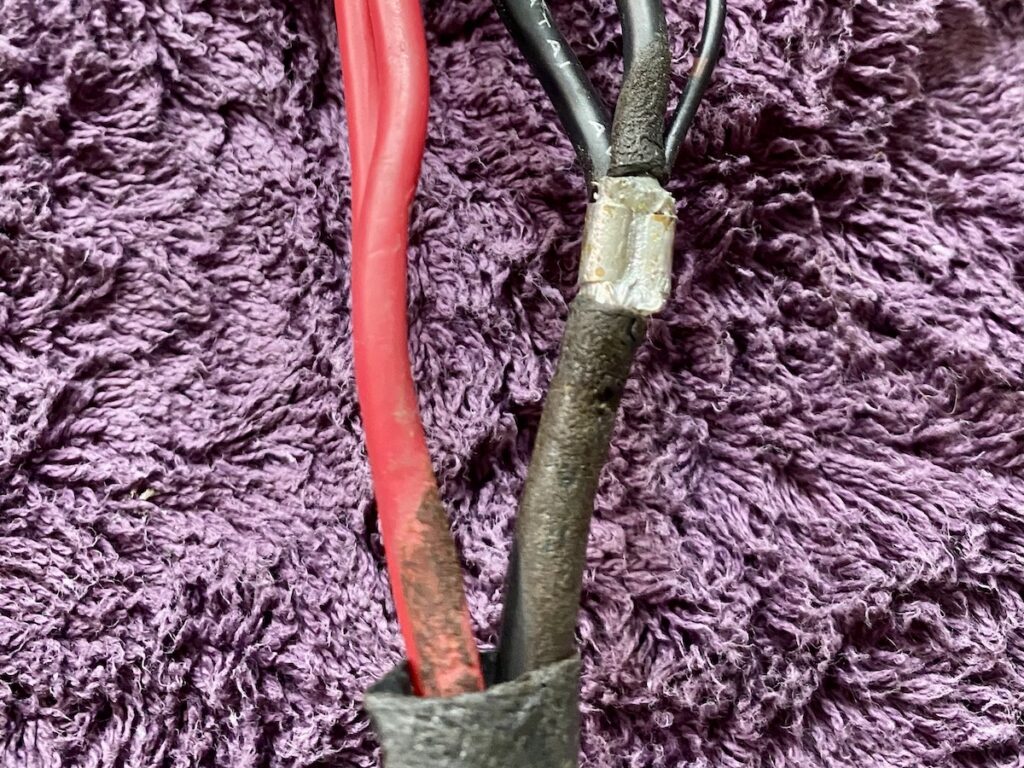
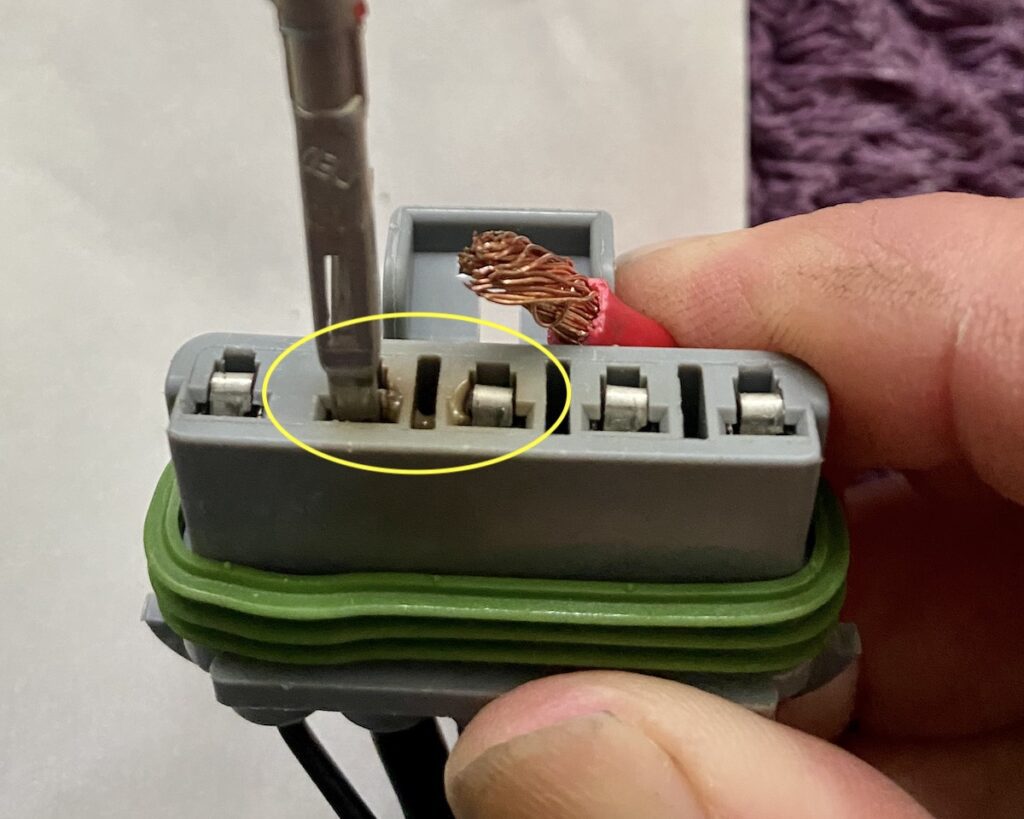
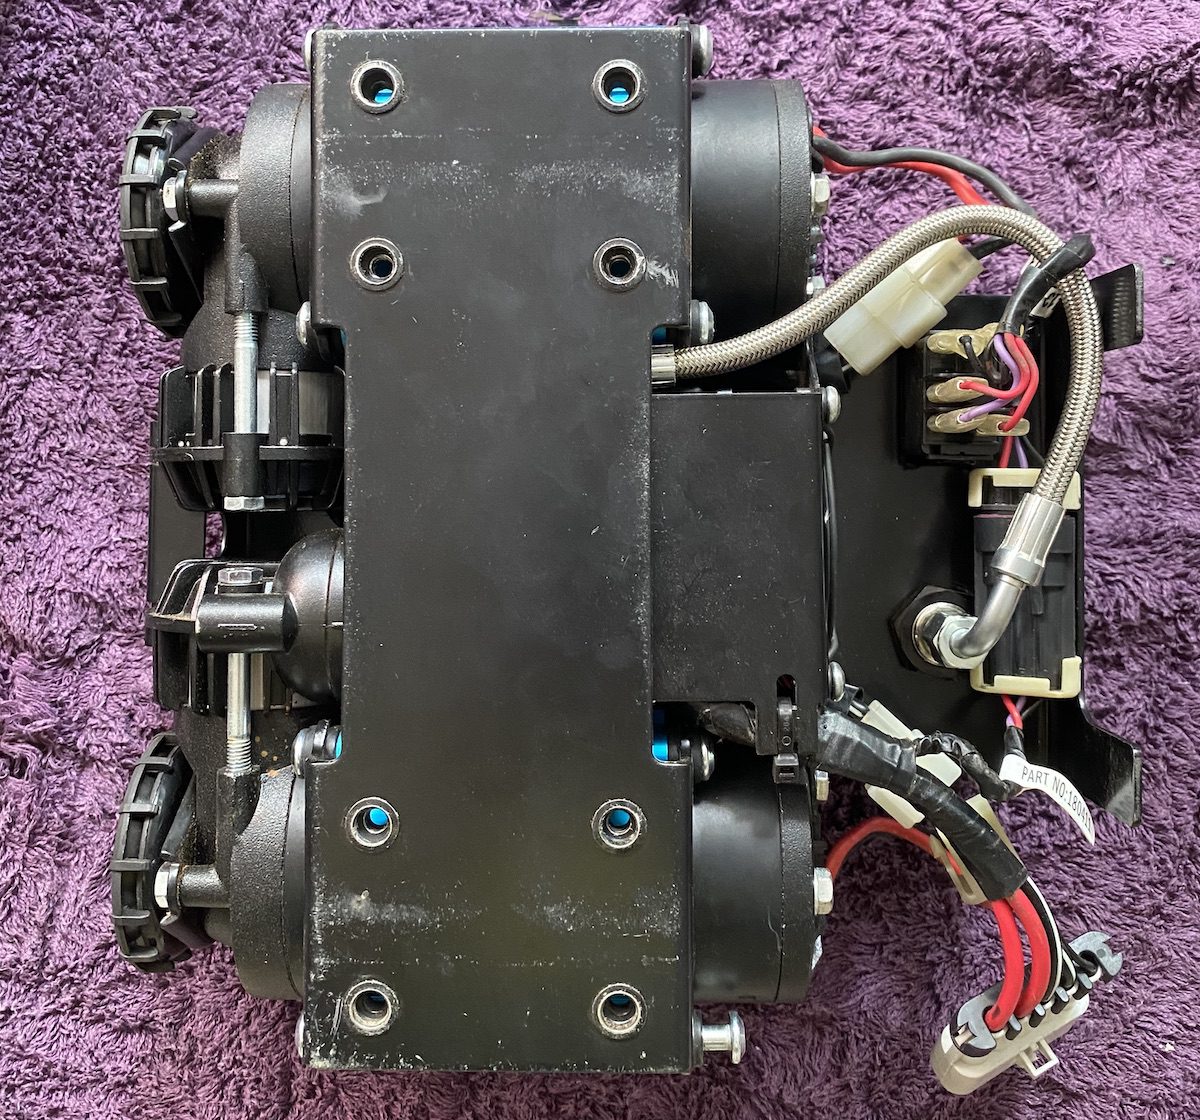
The supply cable connects to the motors with a multi-pin connector. The cross-sectional area of each pin is about one third the size they should be. The housing around both negative pins shows clear signs of having melted… no surprises there.
What’s the Solution For The Cabling?
Short answer? Use much bigger cables and remove the multi-pin connector.
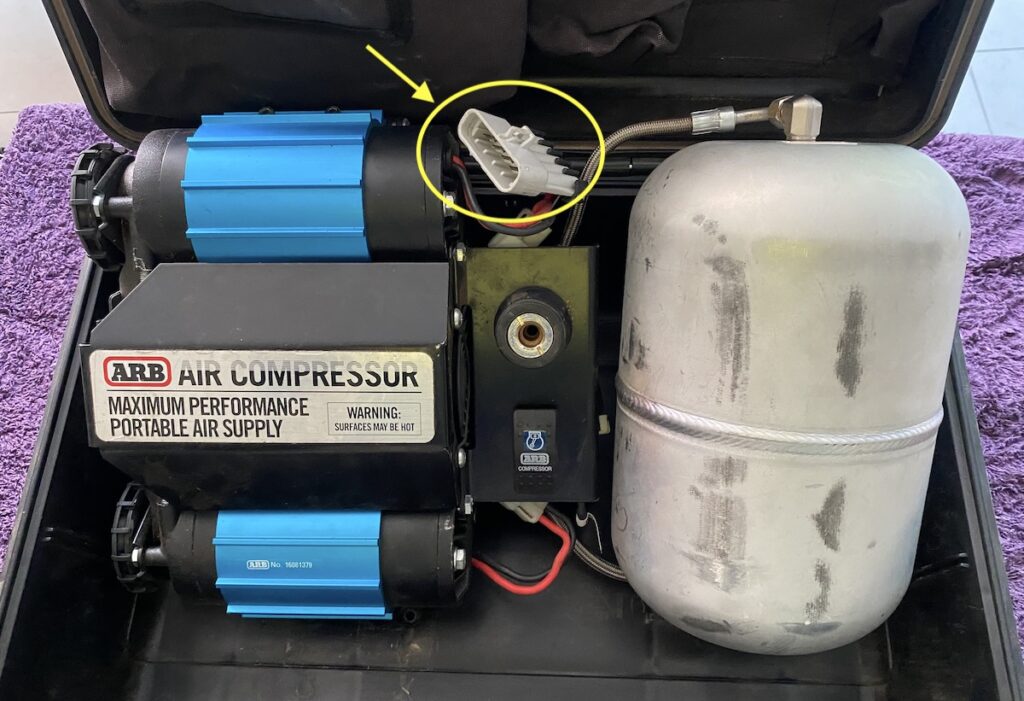
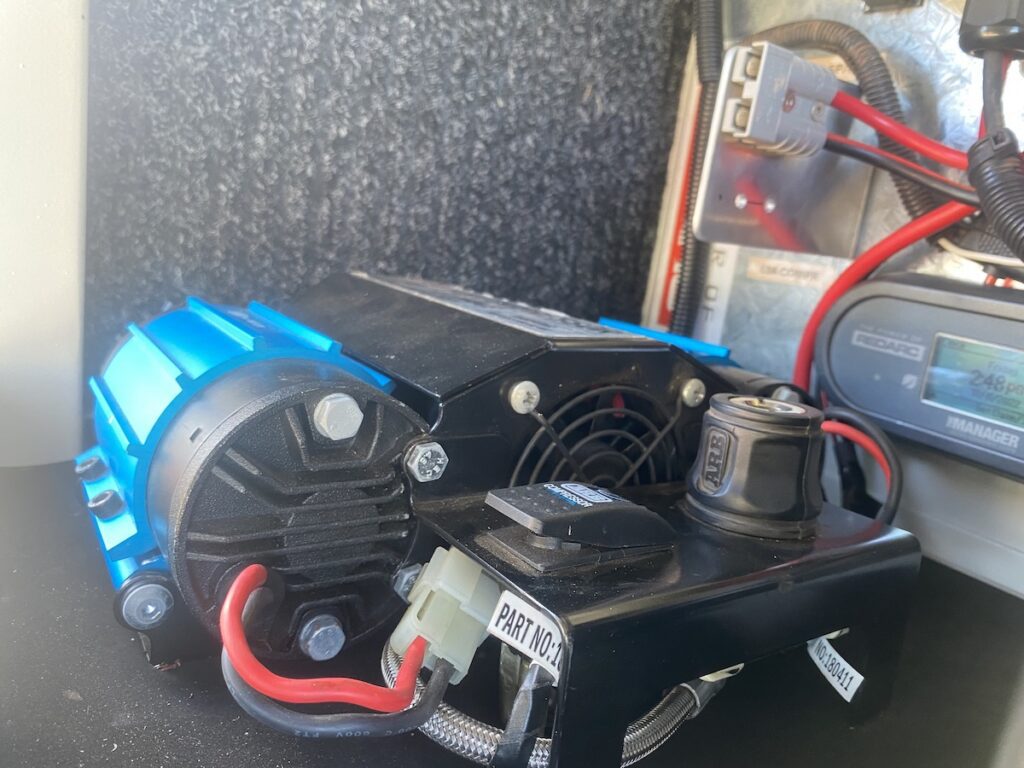
We’ve permanently mounted the ARB twin compressor in a storage box on our truck tray, right beside the dual battery system. This way, the supply cables are as short as possible.
Total cable length (out and back) is now under 1.5 metres. This includes the cable run to/from the circuit breaker and the second battery.
The multi-pin connector was the first thing to go. I ran two 6 AWG cables from the 63A circuit breaker directly to
- the two positive cables, and
- the two negative cables for the motors.
There’s also a small negative cable running out from the motors (for the pressure switch and/or control switch from memory). This now connects to the 6AWG negative supply cable as well.
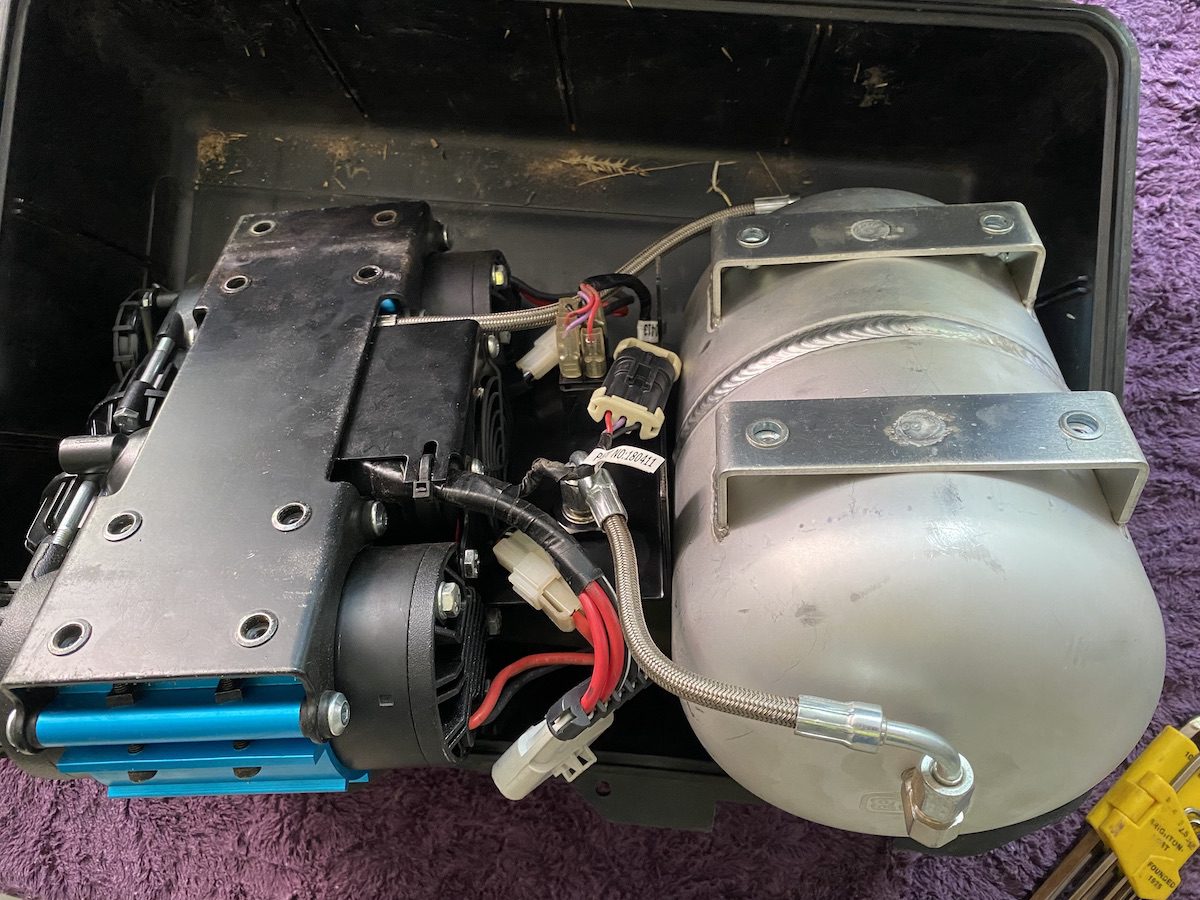
Each motor has a cable connector with 12AWG (equivalent) cables running into the motors. I was intending to remove the connectors and replace the cabling. However, it’s difficult to do without pulling everything apart. So I decided to leave them as is.
What’s The Outcome?
The cables stay cool, especially the 6AWG main supply cables. The short 12AWG cables into the motors still get warm. However, they’re not really an issue now.
The compressor pulls around 56A when it’s running, as expected.
Problem solved!
One thing I didn’t mention. ARB had two blade fuses (maxi fuses), one on each positive supply cable. They would also get too hot to touch. With the new wiring, they’ve been replaced by a 63A circuit breaker.
Now the electrics are sorted, let’s have a look at the mechanical side of converting the portable twin ARB air compressor into an on-board compressor.
How To Convert a Portable ARB Compressor to an On-Board Compressor
Converting the portable compressor to an on-board unit is straightforward.
- Remove Screws
Flip the carry case over. Undo the eight countersunk socket head cap screws (Allen key head). This releases the compressor assembly and air tank from the carry case.

- Remove Assembly
Remove the compressor assembly and air tank as one unit.
- Disconnect Air Lines
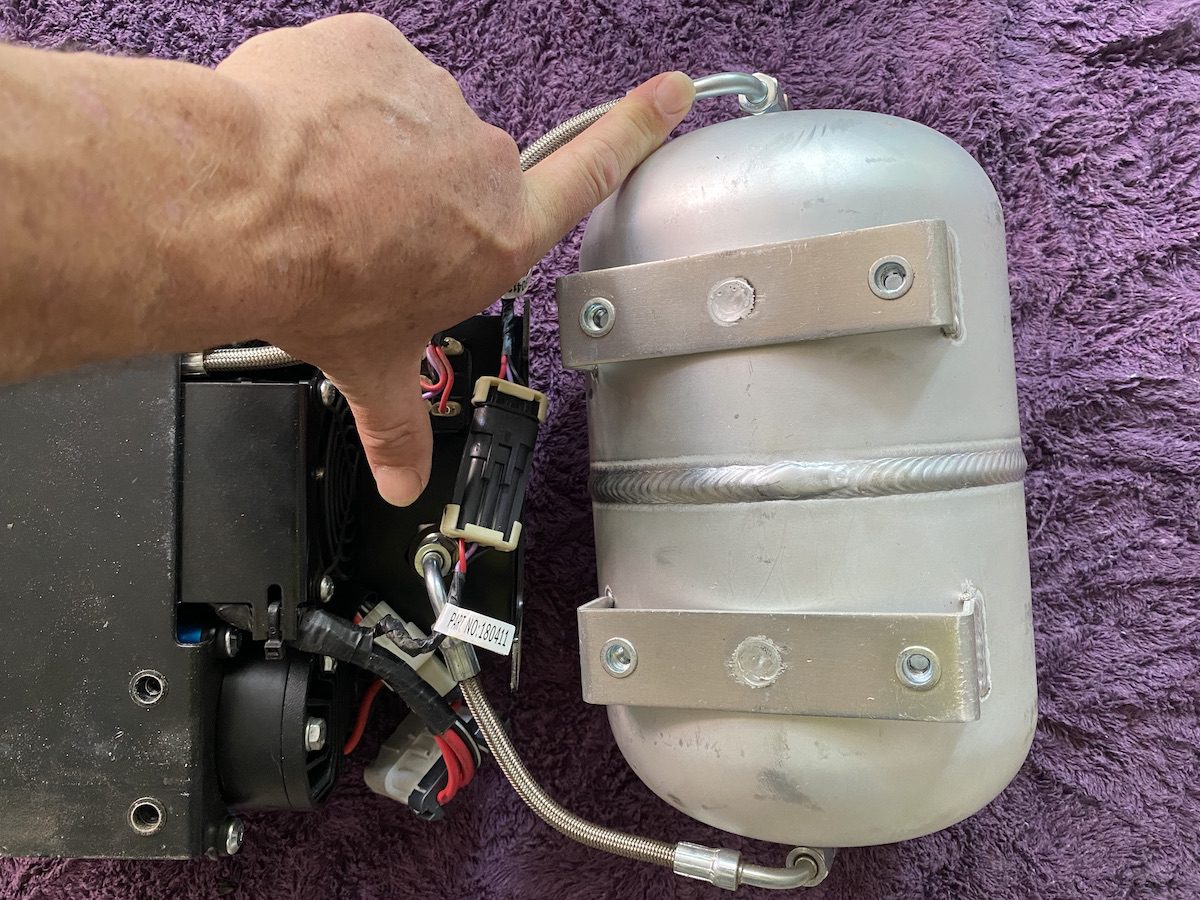
We removed the air tank. If you want to retain the tank, skip to Step 5.
Undo the flexible inlet air line at the tank inlet. Then undo the tank’s outlet air line at the push-in connector. (Index finger and thumb pointing to the connections you need to undo). - Reconnect Air Line
Connect the flexible air line from the compressors directly to the push-in connector inlet.
- Mount In Position
Mark the holes on the panel to which you’re mounting the on-board compressor assembly. Drill ⌀6.5mm holes and attach the compressor assembly using M6 set screws. I inserted a piece of closed cell neoprene between the compressor and mounting plate to minimise noise due to vibration.
Make sure the compressor inlet air filters have clear space around them so they can breathe freely. You also need space to remove the filter covers for cleaning of the filter elements. - Wire
Wire the compressor assembly, taking care to ensure the cabling is sized correctly (see earlier description of wiring changes).
- Test
Once the wiring is complete, turn unit on to ensure it’s wired correctly. Check for any air leaks.

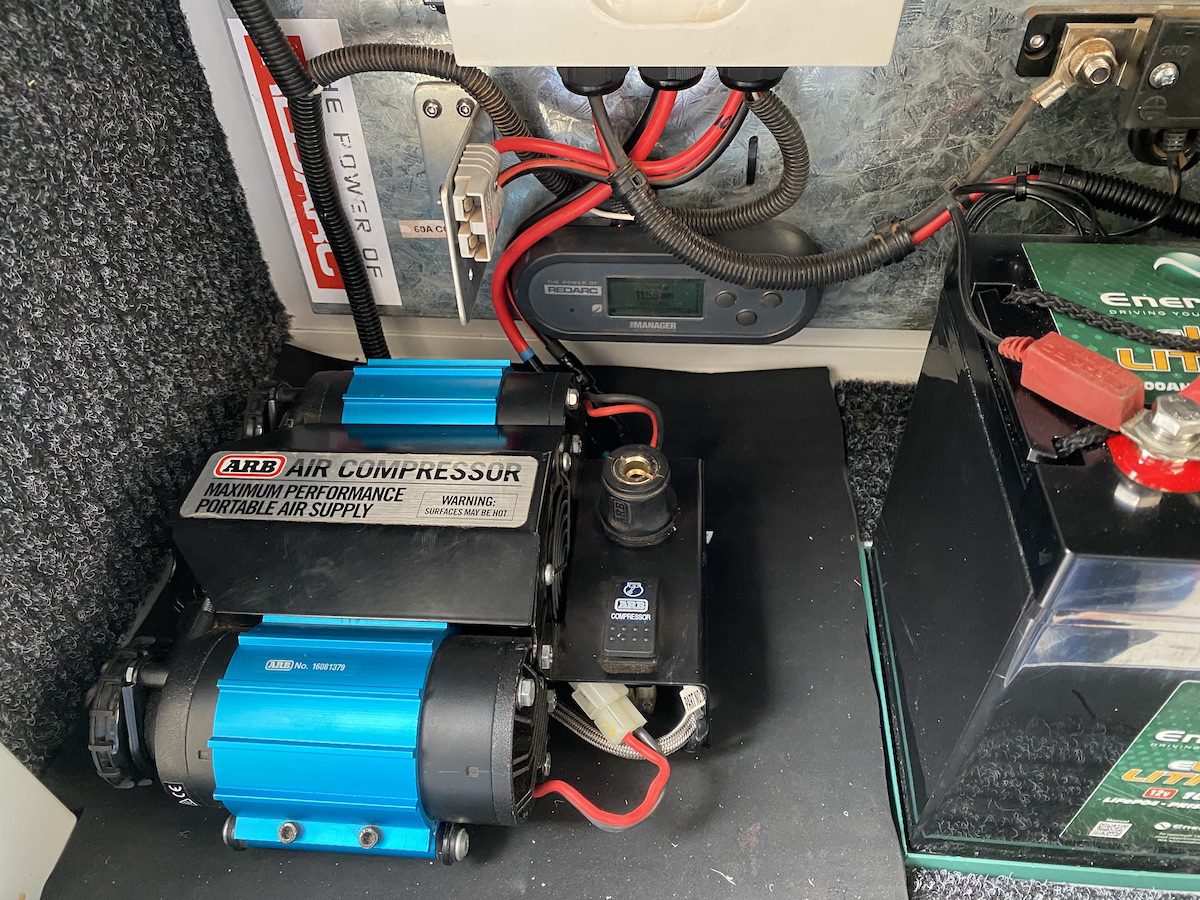
It’s an easy job because the switch and push-in connector are already attached to the compressor assembly. You’re simply bolting down the complete assembly and wiring it up.
Why Not Use The Compressor Air Tank?
Air tanks are accumulators. They even out flow variations and store air. But… only if they’re large enough.
The ARB Twin portable air tank is 4 litres. Does it help when inflating tyres? No.
Why not? As a really rough guide, a 17” 4WD tyre’s volume is somewhere around 100 litres. Say you inflate the first tyre from 20 to 40psi. Without boring you with the maths, you’ll need a 15 litre tank (or thereabouts) to rapidly inflate one tyre.
So, you’ll need a 60 litre tank to rapidly inflate all four tyres.
Four litres is virtually useless. Okay, it will make inflating the first tyre fractionally quicker… although you probably wouldn’t notice the difference.
But once the initial accumulated volume has left the tank and the system pressure levels out, the tank’s doing absolutely nothing. The entire system, including the tank is running at the same pressure.
Remember, this is assuming a 17” tyre. Start inflating 33’s or 35’s and the four litre tank becomes even more ineffective. Our truck’s tyres are equivalent to 36’s and run at up to 90psi.
For our truck tyres, four litres is like one tiny puff of air.
Okay, a four litre tank might possibly help slightly if you’re running air tools. It might even out the supply pressure and allow the tools to run at a consistent speed. But it depends on how much air they use.
That’s why we ditched the air tank. In effect, it does nothing.
Here’s the proof. The air compressor cycles on and off exactly as it did when we were running the tank. There’s zero difference in cycle times… and zero difference in inflation times.
Easy Inflation
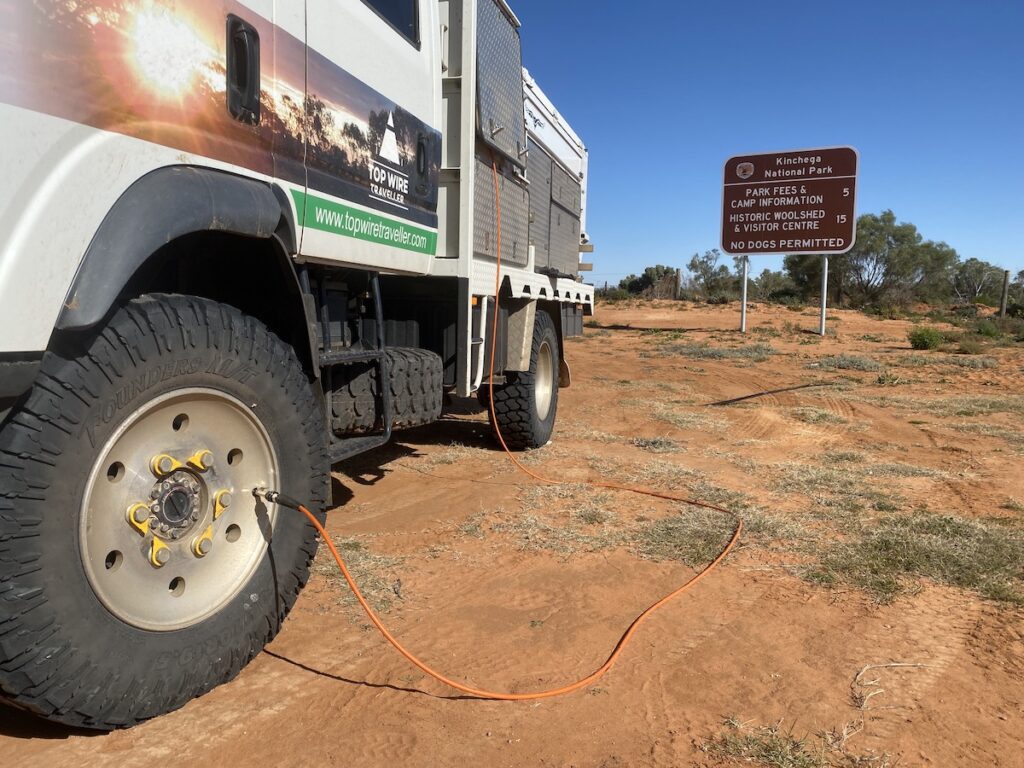
With our portable twin ARB air compressor now operating as an on-board air compressor, tyre inflation is so much easier.
No more digging out the heavy carry case and setting it up. It’s a simple matter of switching on the compressor’s circuit breaker, flicking the compressor switch to On, plugging in the hose, and pumping up the tyres.
Inflating tyres is now an easy job, not a hassle.
If I had my time over again, I’d buy a 24V unit. Why?
- The truck runs on 24V, and
- 24V cables are half the size of 12V cables.
Would I buy another ARB twin compressor, now it’s working reliably? Maybe, if I had a ute and ARB could 100% assure me the problems we had with it are behind them now.
But the truck’s engine has a spot for a belt-driven compressor. I’d probably do this instead.
Either way, it’s hard to go past the convenience of having on-board air. And if you have a portable ARB compressor and want to convert it to an on-board air compressor, it’s an easy job.
A job I highly recommend doing.
Go here for more How-To Guides and tips.

Get your Traveller’s Guides
… and a whole lot more at our FREE RESOURCES Page!
Any questions or comments? Go to the Comments below or join us on Pinterest, Facebook or YouTube.
Any errors or omissions are mine alone.
Hello Andrew. Thanks for putting together such a practical description of the job and the technical reasons why you did what you did. So helpful !!
I’m glad to hear it’s helpful, thanks Martin! Cheers, Andrew
Hi.
Can you supply a wiring diagram for the changes you have made?
How would this compressor handle being installed behind an enclosed rear quarter panel of the Nissan Patrol Y62 (from a heat, filter perspective)?
Cameron
Hi Cameron,
I don’t have a wiring diagram as such. But supply the two positives and two negatives (one each for each motor) with a single positive and a negative cable, then size them for at least 60 amps. Fit a fuse big enough to protect the cables (and at least 60 amps), and keep the cables as short as possible. Use our Cable Sizing Calculator to size the cables properly.
The compressor generates a lot of heat. The compressors will be too hot to touch, so make sure you have plenty of ventilation. You might want to add air vents if you’re thinking of fitting it in an enclosed quarter panel.
Hope this helps. Cheers, Andrew
thanks for this, when you cut off the multi pin plug, there is only a short amount of cable to work with.
Do you have any further images of how you cut just before the plug, then took off a bit of insulation and connected in the 6awg. I thought you might have used butt splice connectors.
I was going to take each positive wire, put a 6awg butt splice connector for the 10awg ARB std wiring to 6awg. Then run 2 x separate 6awg postive wires to 2 x midi fuses and also 1 x 6awg black wire. For 2m worth and expect it all to coil up still inside that portable box.
maybe it will be too thick and i will not be able to shut the box.
Also, it appears you took the 2x 10awg red wires and spliced (how) into 1 x 6 awg positive run with 1 x (instead of 2 x fuses) is that right?
Hi David. There was enough cable to strip them back, then solder all 3 cables together (sorry, I don’t have photos of this). You’ll probably have to unscrew the compressor assembly from the carry case to do this though. When the compressor’s upside down, you should have enough cable to do what you need to do.
Your cabling should work, although like you say it might not fit in the carry case.
Yes, I did run the 2x10AWG red wires into the 1x6AWG +ve cable and the same for the -ve. I spliced then soldered them. This video shows an example of a splice if you’re not sure what I mean: https://www.youtube.com/watch?v=uj_PbRBirkQ
Then finally, I used an existing 63A circuit breaker for the +ve cable (a midi or maxi fuse would have done the same job).
Hope this helps. Cheers, Andrew