The 8 Things You Need to Live Off-Grid
Make sure your new camper or van has these 8 essentials…
Note: This article contains affiliate links. If you click through and make a purchase, we earn a small commission at no extra cost to you.
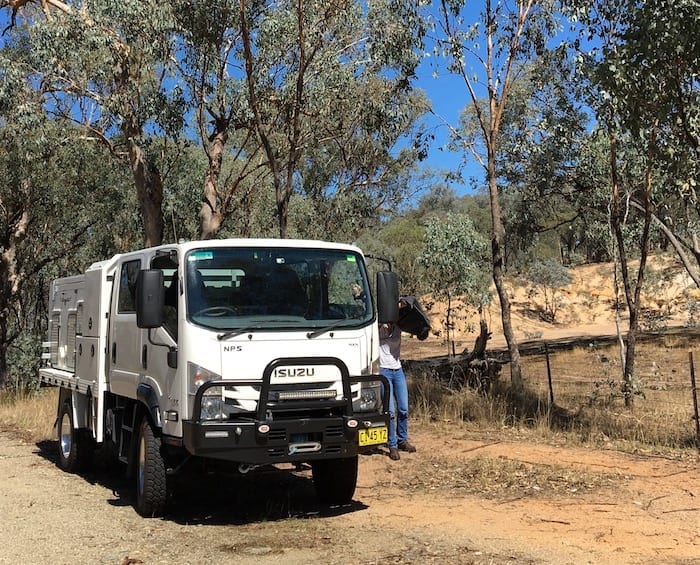
Our Isuzu NPS was due for rego last week. Since we first took delivery, lots of people have asked what’s it like, who built it, what’s an off road truck like to drive and so on.
The rego renewal was a timely reminder for me. We’ve already had it for a year and… so many of you have questions. It’s time to give you some answers!
If you still have a question after you’ve read this, go here to ask. We’ll do our best to give you a sensible answer.
- “Why Did You Choose An Isuzu NPS?”
- “Is It A Custom Build?”
- “Who Built It?”
- “What Are ATW Like To Deal With?”
- “How Much Was It?”
- “What Parts Did You Get?”
- “How Much Does It Weigh?”
- “How Much Can It Carry?”
- “What Other Mods Does It Have?”
- “What Other Mods Are You Planning To Do?”
- “Any Problems?”
- “Would You Buy Another One?”
“Why Did You Choose An Isuzu NPS?”
I’ve covered this in another article, here.
“Is It A Custom Build?”
Yes. After lots of research, we had a list of things we wanted. I won’t go into the details here – I’ll leave that for another day.
“Who Built It?”
All Terrain Warriors (ATW) in Yandina, South-East Queensland.
“What Are ATW Like To Deal With?”
Fantastic. ATW are a small family-owned company. Their customer service is excellent and they go the extra mile to keep customers happy. Highly recommend them to everyone.
Note: We have no affiliation with All Terrain Warriors.
“How Much Was It?”
I’m always a bit coy about this one. Why? Because we bought the cab-chassis plus all mods through ATW as a package. How much you pay depends on lots of things including how many mods you get and their total value.
Suffice to say a cab-chassis Isuzu dual cab is line ball with a 79 series Land Cruiser. Then with all the mods, it’s about the same as a similar-spec 79 series.
“What Parts Did You Get?”
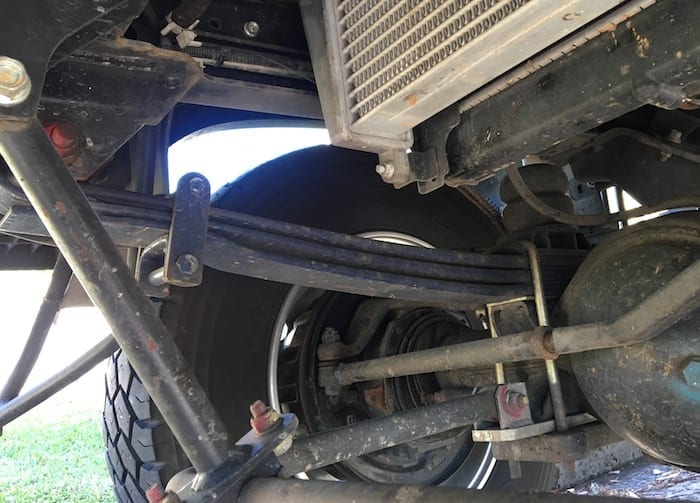
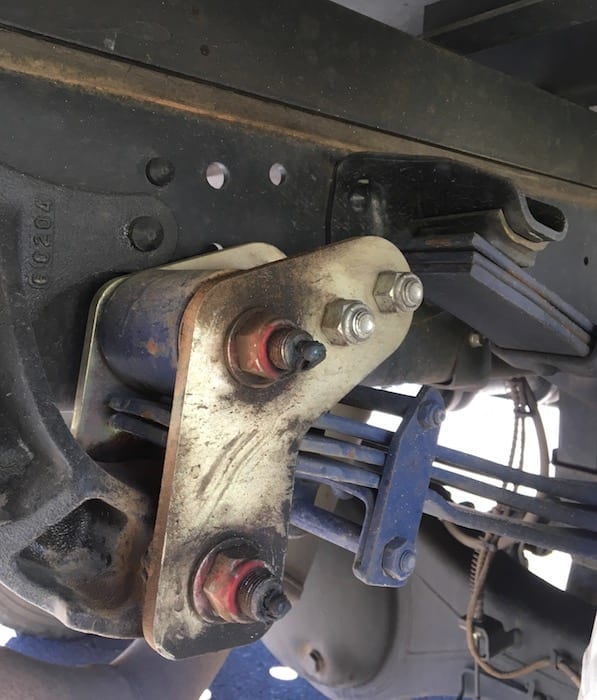
Parabolic Springs
Parabolic springs with greasable bushes replaced the standard leaf springs all around. Why? A smoother ride – the Isuzu NPS in original spec has a very harsh ride.
Adjustable Shock Absorbers
Powerdown adjustable shock absorbers replaced the originals. Why? They are needed with the suspension upgrade.

Super Single Wheels
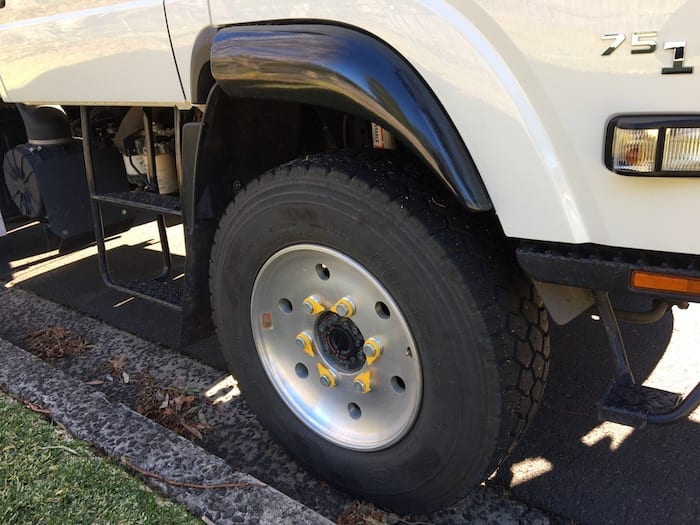
19.5 inch alloy rims fitted with Toyo 285/70R19.5 tyres, new wheel nuts, wheel nut indicators, front wheel arch flares and speedo re-calibration. Why? A few reasons.
- Firstly, larger tyres give a smoother ride.
- Secondly, the front and rear now have the same wheel track – important for sand driving. The factory dual rear wheels aren’t good for pushing through mud or sand. Plus rocks can wedge between the tyres, eventually wear through the sidewall and cause a blowout.
- Thirdly, combined with the suspension upgrade, the tyres help to give the body a lift of around 4 inches.
- And finally, the NPS is geared pretty low. The original 17.5 inch wheels mean 100km/h happens at 2,700rpm. The 19.5s drop revs at 100km/h down to 2,450rpm. Still pretty high, but better.
Spare Tyres
Two spare tyres. Why? Quite simply, a second spare is essential for remote travel.
Bullbar
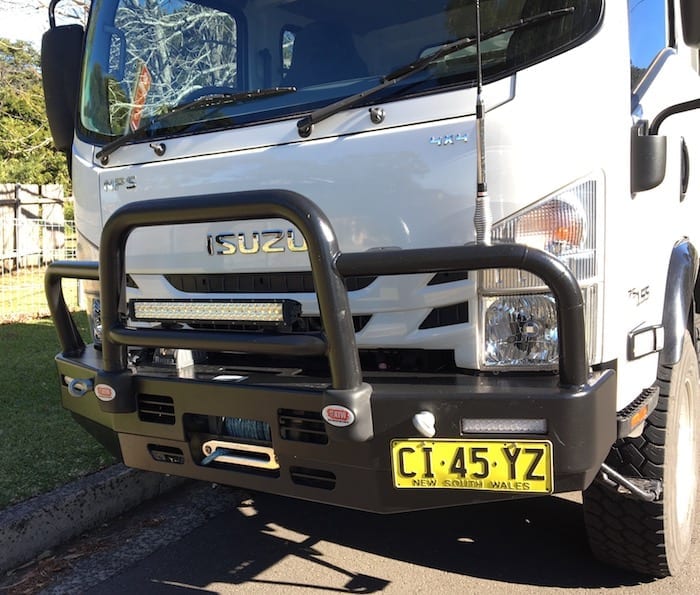
A powdercoated black alloy winchbar. Why? Obviously it’s for frontal protection. It has already paid for itself after we hit a roo in Western NSW. Why alloy? At first, I wanted a steel bar. But after seeing how solid the alloy one is built, I was happy to go with the lighter alloy option.
Front Winch
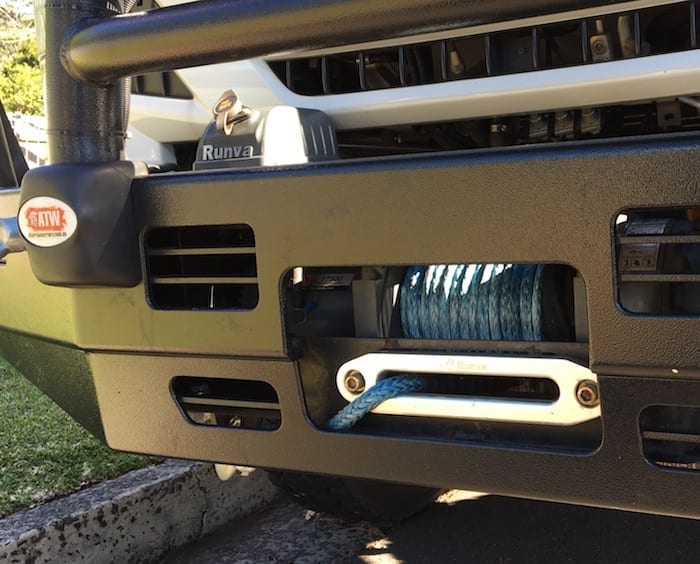
A Runva 17,5000lb winch with Dyneema rope at the front. Why? We’ll be travelling solo so we’ll need all the help we can get.
Tow Bar
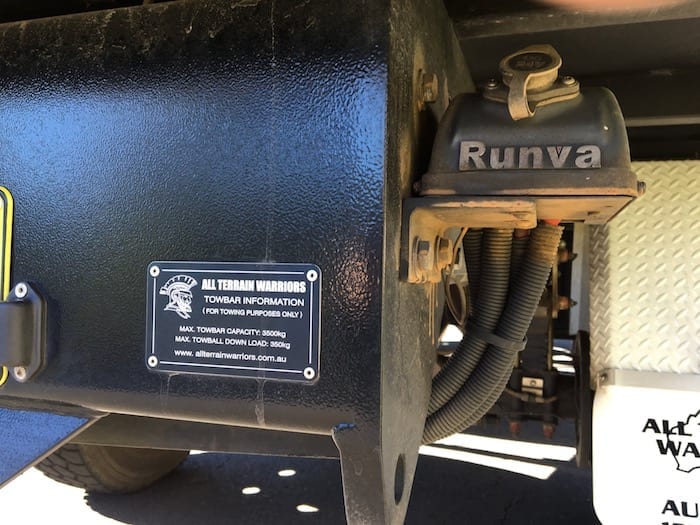
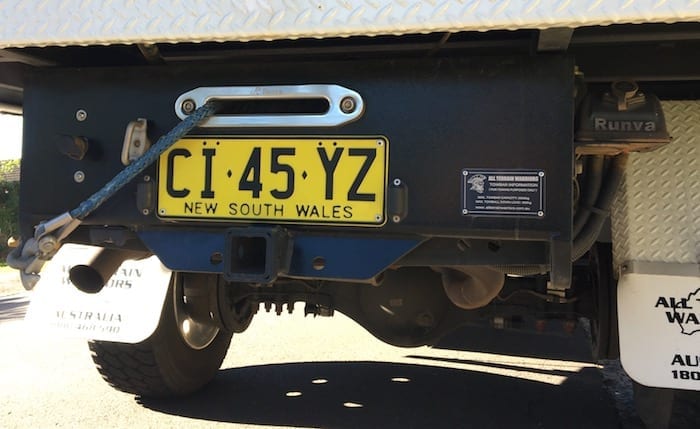
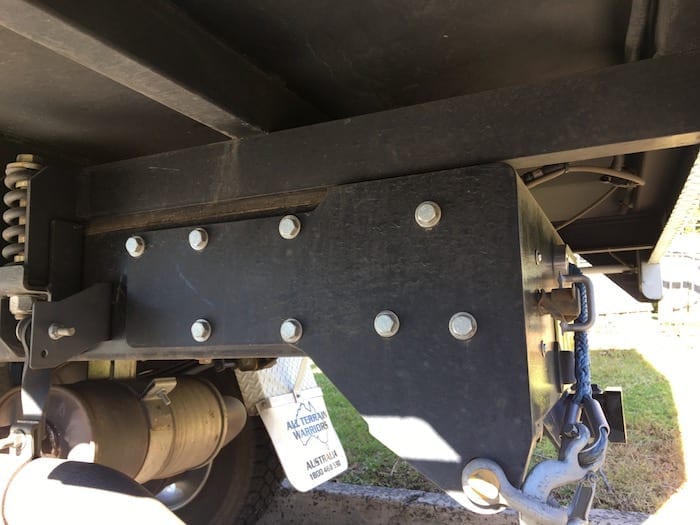
A tow/winch bar kit for the rear. Why? We needed a tow bar. ATW offered this tow/winch bar kit, so it made sense to fit another winch at the rear – again to give us the best chance of extracting ourselves from a nasty predicament.
Given we could fit a winch, the logic was that if we didn’t get a winch now, then we never would. The tow bar takes a standard Hayman-Reese hitch.
Brake Controller
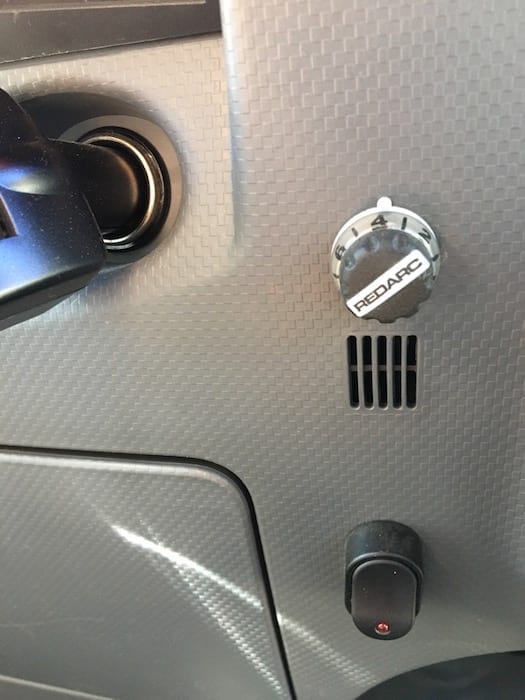
A REDARC Tow Pro Elite trailer brake kit. Why? There’s a good chance we’ll be towing a rally Pajero from time to time, so a brake controller is essential.
Front LSD
Front ATB limited slip diff. This is fully automatic and believe me, makes a huge difference off road. It operates seamlessly and prevents wheelspin.
Breather Kit
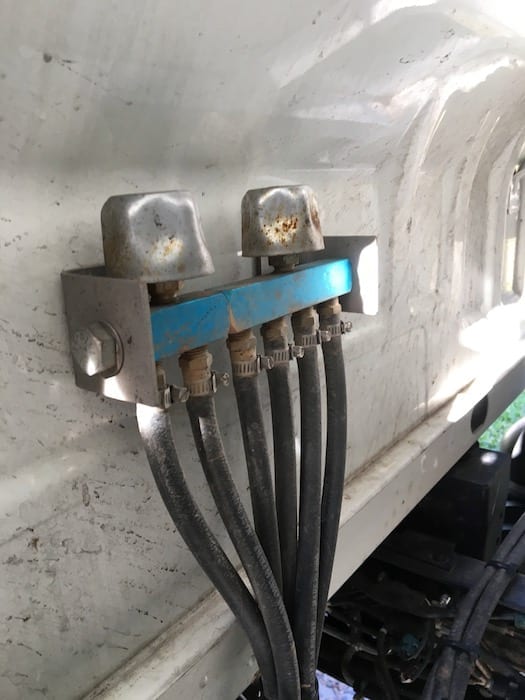
A raised breather kit for gearbox, transfer case, both diffs and both fuel tanks. Why? We’re pretty keen to keep water out of the bits that spin.
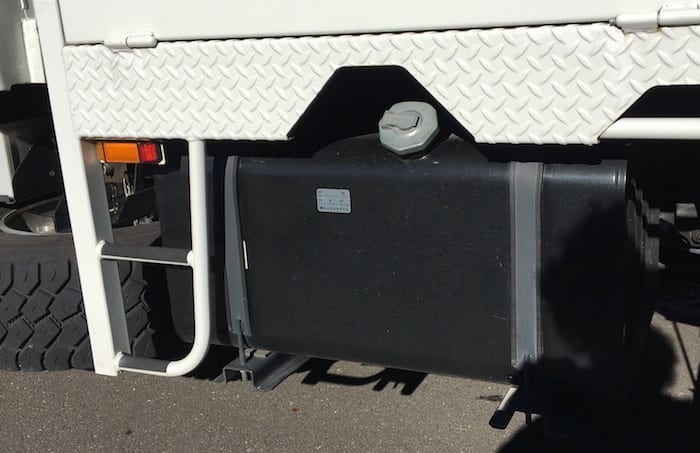
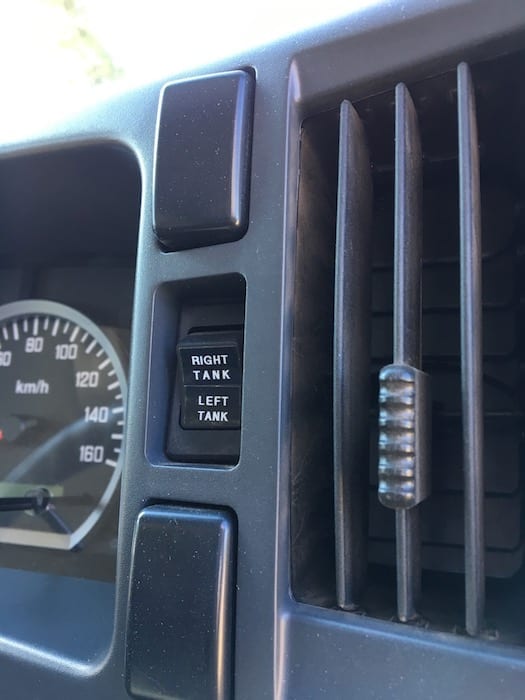
Fuel Tanks
A second 140 litre fuel tank. Why? We wanted as much fuel capacity as we could for remote travel.
Tray
Steel tray with front toolboxes. Why steel? If we damage the tray, we’re far more likely to find someone in a remote area who can weld mild steel rather than aluminium. The compromise is of course added weight.
The toolboxes are used for work. When not in work mode, they give us lots of lockable storage space.
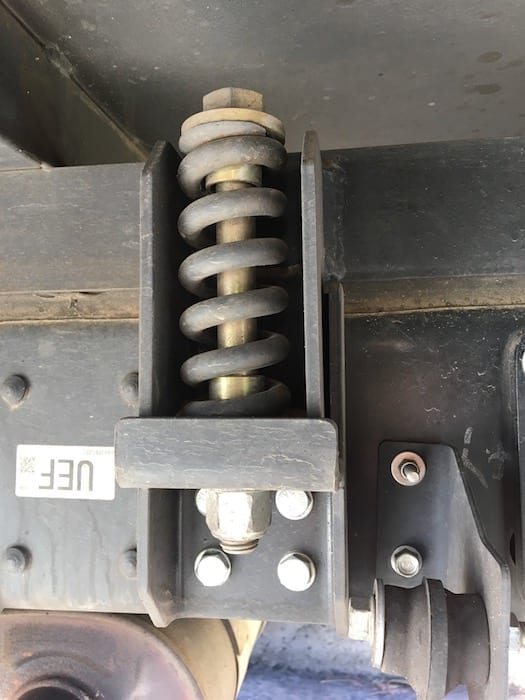
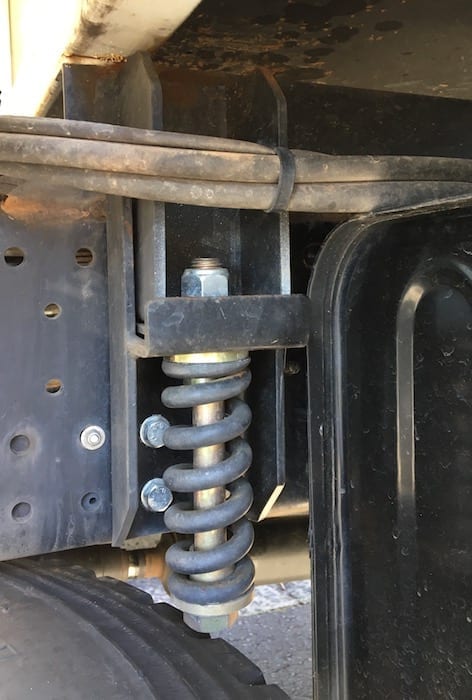
The tray has 6 spring mounts. Why? We wanted the chassis to flex independently of the tray. If the chassis can do its own thing, we have less chance of getting hung up on rugged tracks – and less chance of something cracking or breaking.
In practice, it’s fantastic. A bonus is the tray is not copping a pounding on rough roads.
Cruise Control
Cruise control. Why? The NPS does not offer cruise control – even as an option. Obviously, cruise control make long distance driving far more relaxed.
Window Tinting
Side and rear window tint. Why? We’ll be spending much of our time in hot places. So anything we do to keep the sun out of the cab can only be a good thing.
Phew, I didn’t realise the “extras list” was so long!
“How Much Does It Weigh?”
Empty, just over 4,000kg with fuel.
“How Much Can It Carry?”
The NPS 75-155 has a 7,500kg GVM. This gives us 3,5000kg payload, so we’ll have no issues with being overloaded. Having said this, we will of course keep weight down where possible.
“What Other Mods Does It Have?”
Performance Chip
DP Chip from Berrima Diesel. In standard tune, the NPS is pretty lethargic at low revs. I was looking for a bit more get up and go off the mark and also wanted it to hang on a bit longer before down-changing. The DP Chip has made a big difference to driveability – it’s about half a gear better. This mightn’t sound like much, but in a 5-speed it is significant.
Update: The DP Chip has been removed. See our Year 2 Review for more details.
Second Battery System
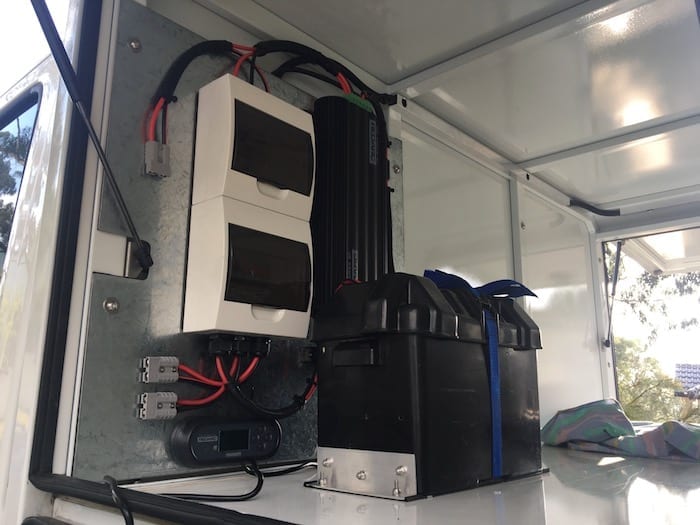
The truck has a 12V second battery system. We needed to run an air compressor, a fridge and lighting inside the toolboxes. The Wedgetail Camper has its own self-contained battery system. But the Wedgie is a slide-on, so there are times when we won’t have the camper on the back of the truck. Hence the decision to install an independent 12V system for the truck.
Inverter
We’ve temporarily fitted a 300W inverter inside the cab. This was originally fitted in our Pajero. We use this to charge phones, iPads and laptops.
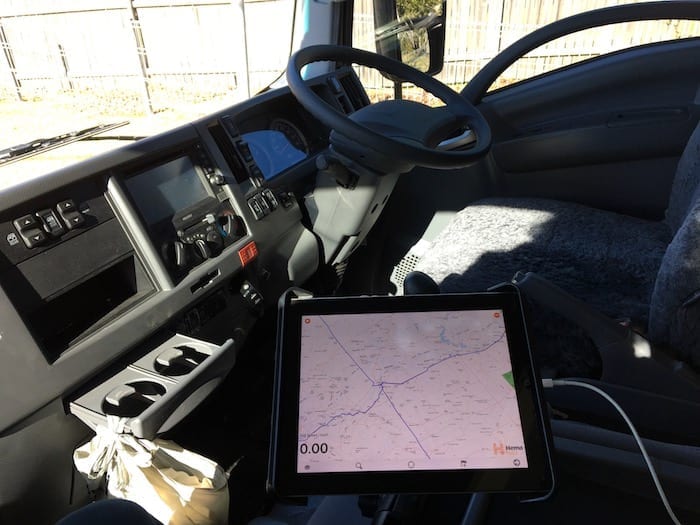
iPad Mount
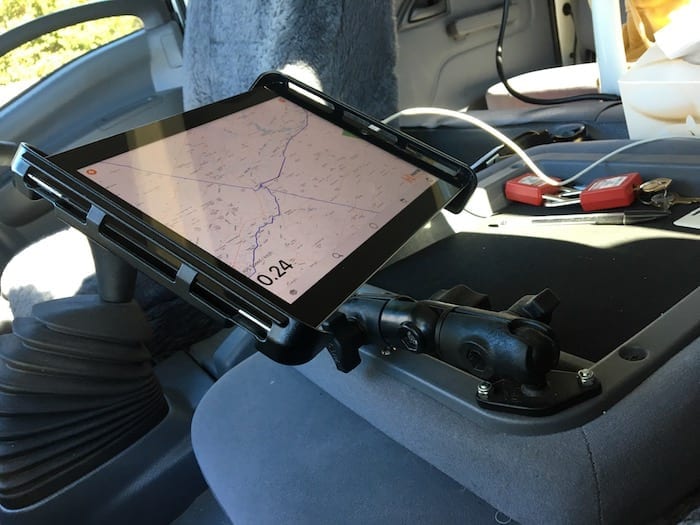
A RAM mount for the iPad. The iPad has the Hema 4WD Maps app and the large screen is brilliant.
UHF
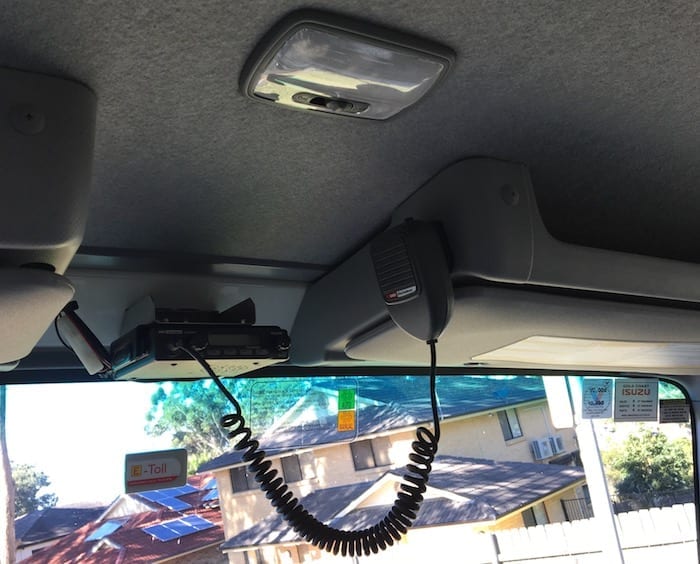
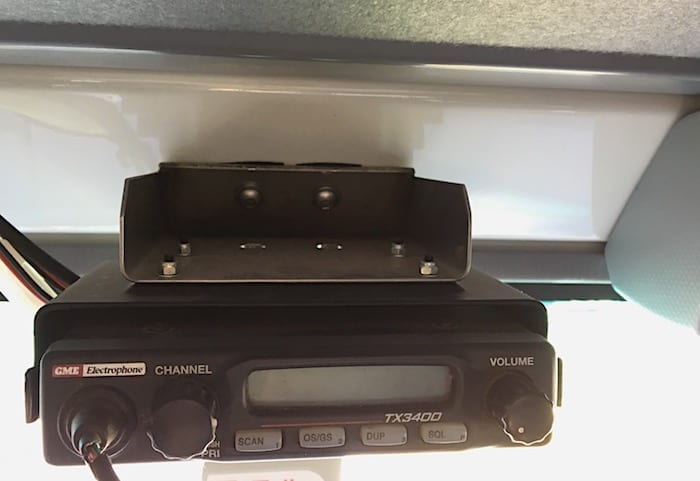
A GME UHF, again from our old Pajero. The NPS was supplied with a centre rear vision mirror – not much use considering we have a headboard and toolboxes directly behind the cab. The mounting holes for the mirror provided the perfect spot to mount the UHF.
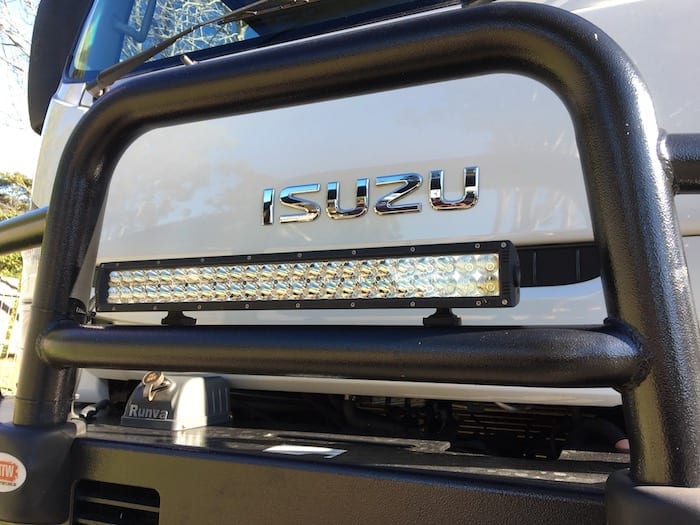
Light Bar
A Hard Korr light bar. The standard high beam leaves a bit to be desired, so we needed some more light. With a combination of spread and spot, this light bar is perfect for our needs.
“What Other Mods Are You Planning To Do?”
Shelving
The biggest one is fitting out shelving in the toolboxes. This will be timber shelving and partitions, all bolted together then covered with marine carpet. From past experience this combination seems to work well, as it allows everything to flex without breaking.
Lighting
Lighting inside the toolboxes. The lights are sitting in a box in the garage, just waiting for me to install them…
Storage
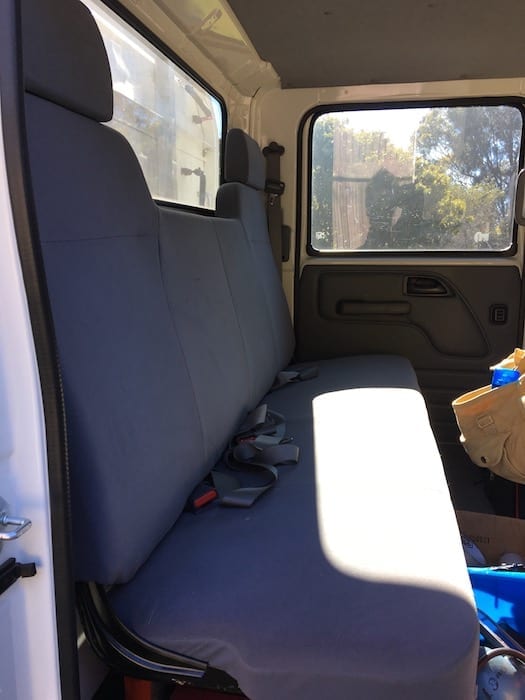
We bought a dual cab so we’d have more internal storage. The rear bench seat fits four adults. We are going to get the bench seat cut down to two individual seats. They will be at the ends, near each door.
In between we are going to install a storage system, including space for a freezer. This will also give us somewhere convenient to fit an inverter and USB outlets for charging.
Passengers Seat
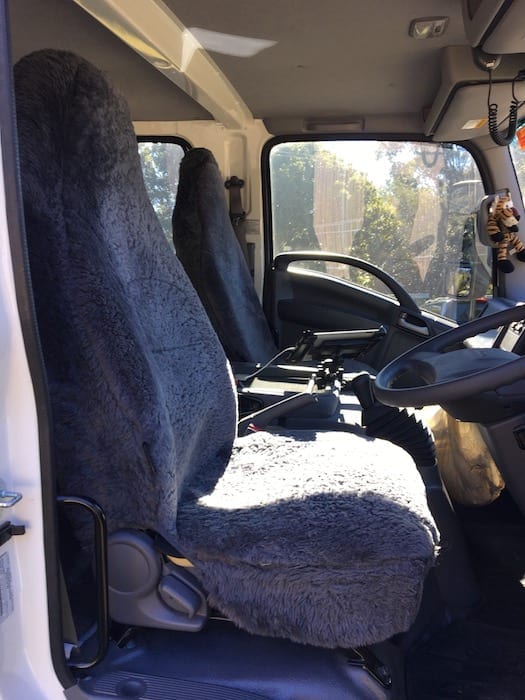
The passengers seat needs more padding – it’s pretty agricultural. This will be done when the rear seats are modified. Unfortunately we can’t fit a bucket seat because access to the engine is under the hinged passengers seat.
Drivers Seat
We might fit a suspension seat kit to the existing drivers seat. For some reason, Isuzu only fit suspension seats to single cabs.
Water Tanks
We have 90 litres in the Wedgetail Camper. For serious remote travel, we want another 70 to 80 litres. I’m still figuring out what tanks to buy and where to mount them.
Sullage Tank
The Wedgie has a sink and a shower. Some places – like National Parks – require the vehicle to have a sullage tank. So we’ll install a 30 – 40 litre tank under the tray.
Reversing Camera
For safety when reversing in camp grounds.
Tyre Pressure Monitoring System (TPMS)
A few years ago, I was a passenger in a large truck which had a steer tyre blow out. Let me tell you, it’s not something I ever want to experience again! To me, a TPMS is an essential piece of equipment. Blowouts are caused by heat build-up, most commonly due to under-inflation from a slow leak. If the TPMS can give me early warning of an issue, then it is money well spent.
Of course, all of these items require money – some more than others. Some are really important, others not so much. It’s a matter of prioritising.
“Any Problems?”
Just a couple of teething problems so far.
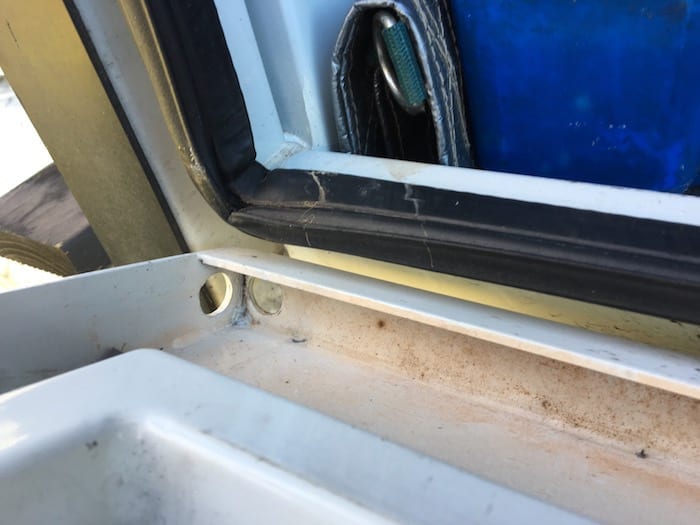
When we bought the truck, we had months of rain – often heavy rain. We were getting a small water leak into one of the bottom toolboxes when parked facing downhill. We finally narrowed it down to the door design.
The doors are folded mild steel and have a folded channel all around. We finally realised water was building up in the channel and couldn’t get away quickly enough. So it would overflow and leak past the rubber seal and into the toolbox.
We fixed this by punching drain holes into the folded door channel with a hydraulic punch. Problem solved.
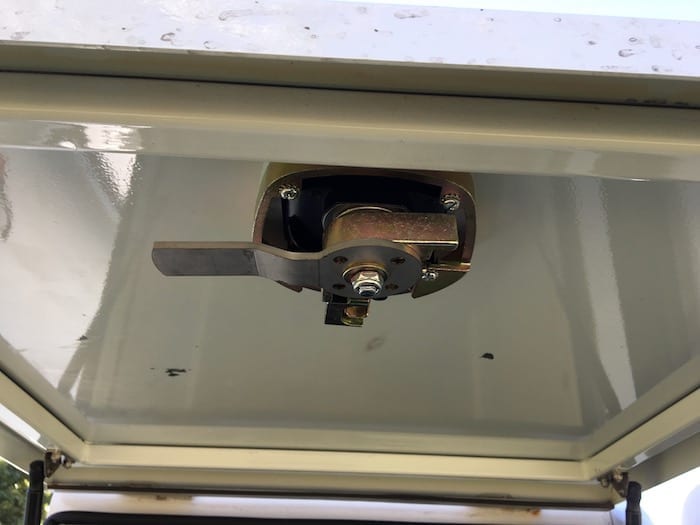
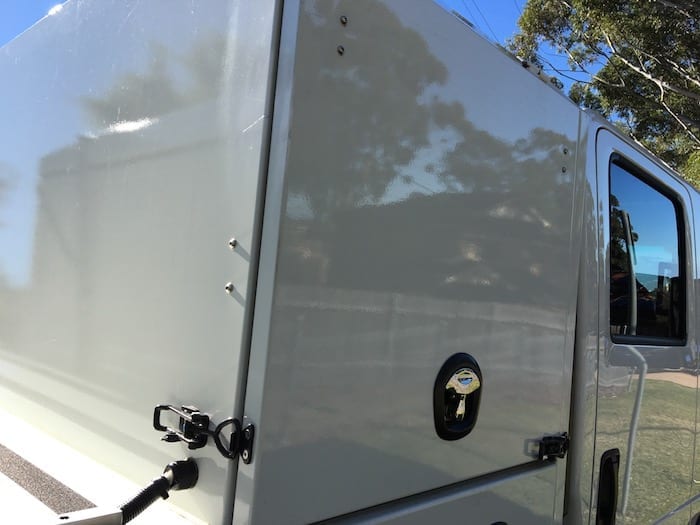
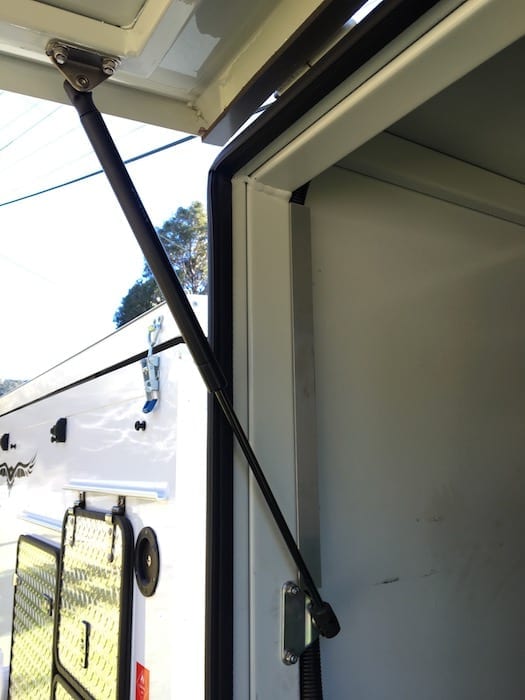
The only other problem was with the top toolbox doors. They swing upwards on gas struts. So the door lock was always holding the door closed against the pressure of two strong gas struts.
After travelling on some rough country dirt roads, one of the door latches broke off. This was caused by constant corrugations, combined with the latch trying to hold the door closed against the pressure of the gas struts.
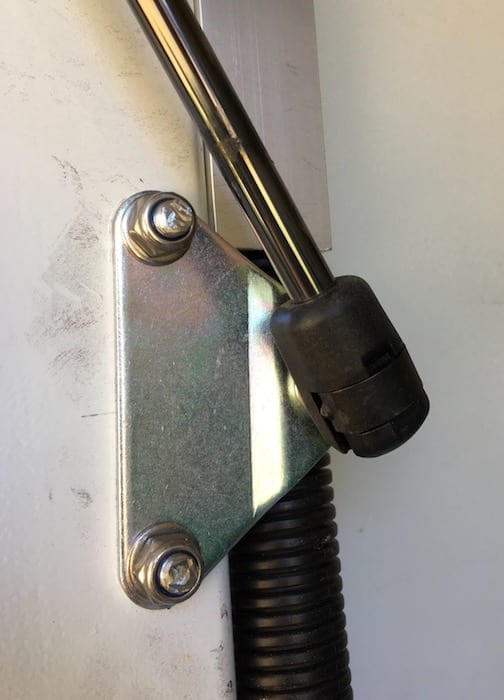
To eliminate this, I fitted extra external latches to take the pressure off the door latch. I also replaced the gas strut mounting brackets with heavy duty ones. These brackets were originally held on with pop rivets – I used stainless steel bolts and Nyloc nuts instead.
These were only minor issues and easily fixed.
And credit where credit is due: All Terrain Warriors were exceptionally helpful in diagnosing and correcting these issues. They were even prepared to send someone from the Sunshine Coast to us at Wollongong if need be!
“Would You Buy Another One?”
In a heartbeat. Yes, it’s a truck and it drives and rides like a truck. However, this is actually a positive. Sitting up high gives us a panoramic view – perfect for travel. And because it’s a truck, we have to slow down and not drive like maniacs… better for the heart rate and stress levels!
For a Year 2 Review on our Isuzu NPS, go here.
Go here for more Reviews on our 4×4 Isuzu NPS truck.
Get your Traveller’s Guides
… and a whole lot more at our FREE RESOURCES Page!
Any questions or comments? Go to the Comments below or join us on Pinterest, Facebook or YouTube.
Any errors or omissions are mine alone.

This sounds like a good bunch to deal with I’m looking at setting up one. how good are they to deal with. I have traveled around a lot of country with trucks now it’s time to stop and have a good look around
Hi Oscar,
Yes, ATW are great to deal with. They’re very helpful and know their products.
Enjoy your travels!
Cheers, Andrew
hi the mounts for the tray and springs where did you get
Hi Peter. All Terrain Warriors supplied and fitted the spring mounts when they built the tray. Cheers, Andrew